

If you were one of the attendees of my session at BC TechDays 2026, probably now you know that Azure Logic Apps Standard now supports a powerful Agent Loop capability, enabling you to build both conversational and autonomous AI agents directly inside your workflows. These agents are powered by Azure OpenAI models and can call any of the 1400+ Logic Apps connectors as tools.
However, by default, the connection between your Logic Apps agent and Azure OpenAI goes over the public internet (your Azure OpenAI endpoint is publicly reachable, and Logic Apps calls it using an API key or managed identity over HTTPS). For some enterprise scenarios, this could be a problem. You want zero public internet exposure: traffic between Logic Apps and Azure OpenAI must stay entirely within the Microsoft backbone network.
This was exactly one of the questions received after the session from one of the attendees. I quickly answered live in the session and I promised a blog post on this topic. And here it is…
P.S. First of all, thanks a ton to everyone that shared with me lots of positive feedbacks after that session. I’m very happy that this topic passionated you exactly like it passionates me every day. And yes, plans are to repeat that session in the next events, maybe with some changes adapted to the audience. I have lots of cool stuffs around this topic to share.
Architecture Overview
The secure architecture to achieve this goal involves three main layers:
- Azure OpenAI instance with private endpoint configured, public network access disabled.
- Virtual Network (VNet): a shared VNet that both the private endpoint and Logic Apps outbound traffic will use.
- Logic Apps Standard with VNet integration enabled for outbound traffic, using a System-assigned Managed Identity to authenticate to Azure OpenAI (no API keys).
All traffic flows privately. No data traverses the public internet.
Note: VNet integration for outbound traffic is not available in Azure Logic Apps Consumption. If you need private networking with an agent loop, you must use Logic Apps Standard.
Step 1: Prepare the Virtual Network and Subnets
In the Azure Portal, navigate to Virtual Networks and create a new VNet (or open your existing one). Ensure the address space is large enough to accommodate two /24 subnets, for example 10.0.0.0/16.
Inside your VNet, add a subnet for private endpoints:
- Name:
snet-private-endpoints - Address range: e.g.,
10.0.1.0/24 - Subnet delegation: None (private endpoint subnets must have no delegation)
- Private endpoint network policies: Leave as default (
Disabled) unless your organization enforces NSG on private endpoint subnets. In that case, set it toEnabledand configure your NSG accordingly.
Add a second subnet for Logic Apps outbound traffic:
- Name:
snet-logic-apps-outbound - Address range: e.g.,
10.0.2.0/24 - Subnet delegation:
Microsoft.Web/serverFarms— this delegation is required for Logic Apps VNet integration to work.
Important: The Logic Apps outbound subnet must not be used by any other resource that requires delegation. A delegated subnet can only be assigned to one service type.
Step 2: Create a Private Endpoint for Azure OpenAI
This step attaches a private network interface (with a private IP from your VNet) to your Azure OpenAI resource. After this, Azure OpenAI becomes reachable via a private IP address inside your VNet.
In the Azure Portal, open your Azure OpenAI resource. In the left menu, under Resource Management, select Networking. On the Networking blade, select the Private endpoint connections tab, then click + Private endpoint.
Fill in the wizard:
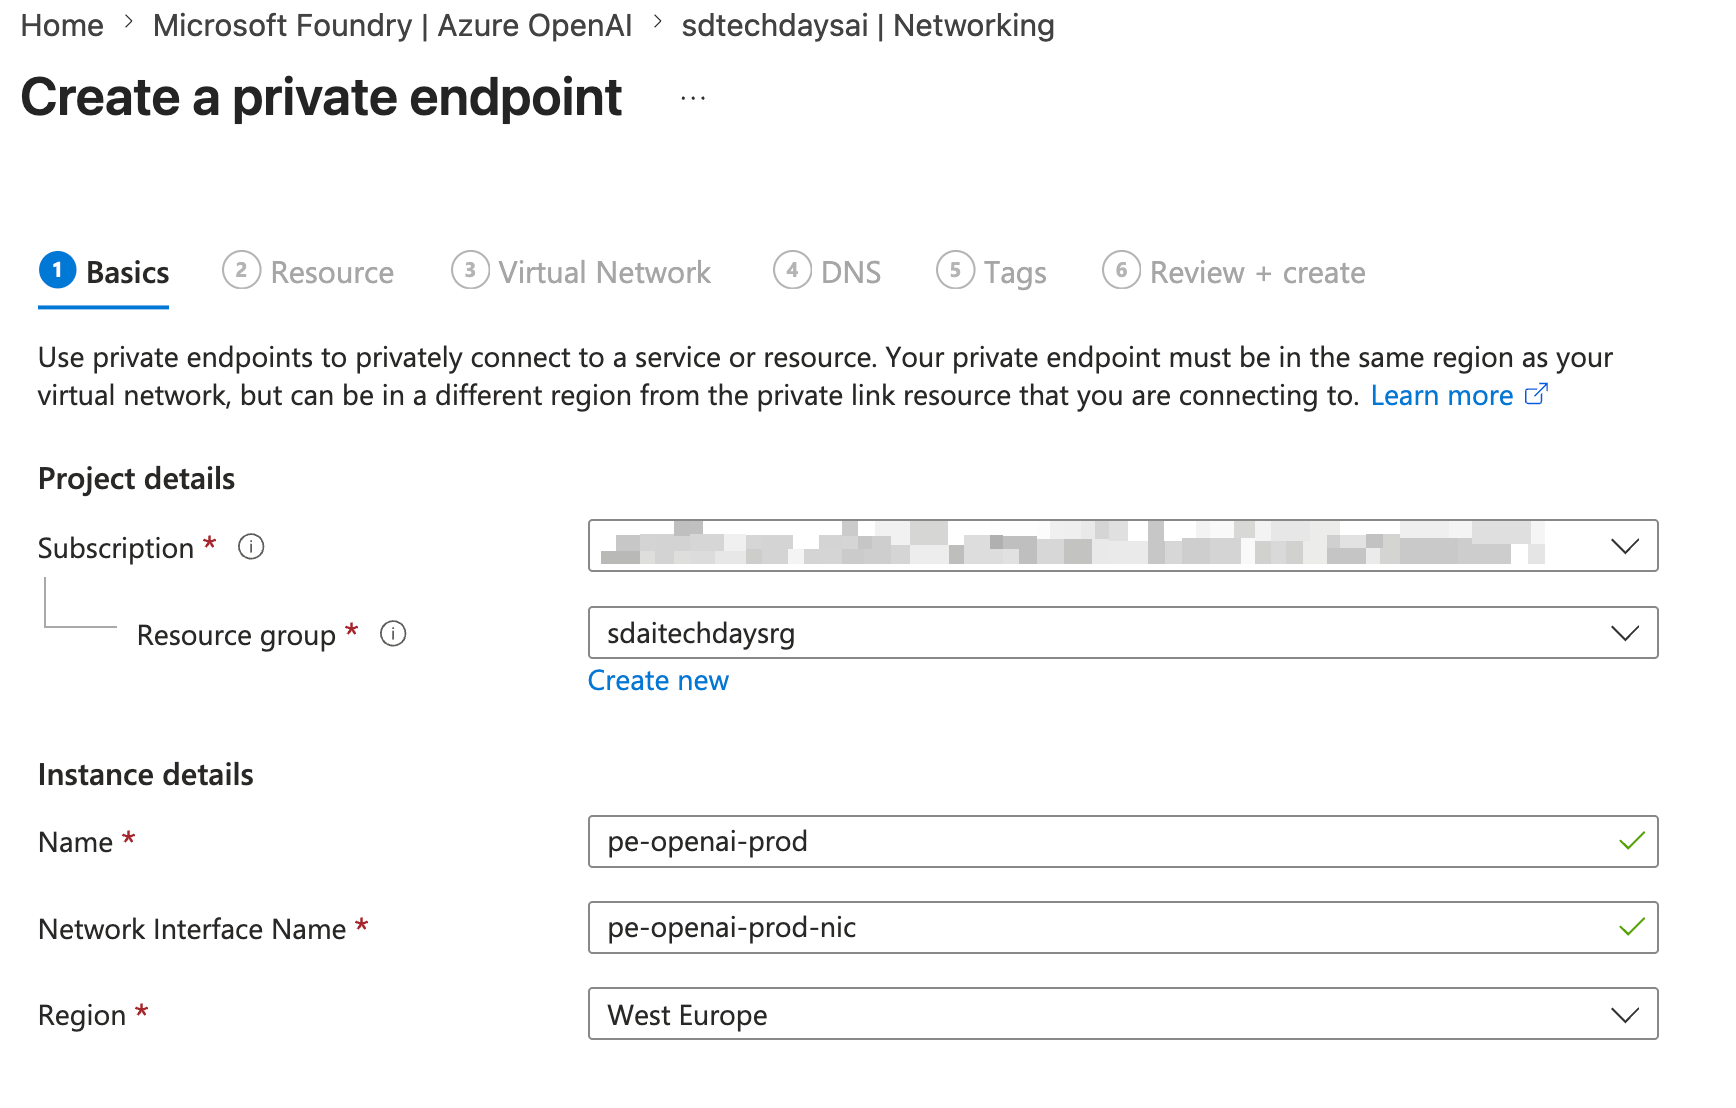
Basics tab:
- Subscription: Your subscription.
- Resource group: Use the same resource group as your VNet, or a dedicated networking resource group.
- Name: e.g.,
pe-openai-prod - Network interface name: Auto-filled (e.g.,
pe-openai-prod-nic) - Region: Must match the region of your VNet.
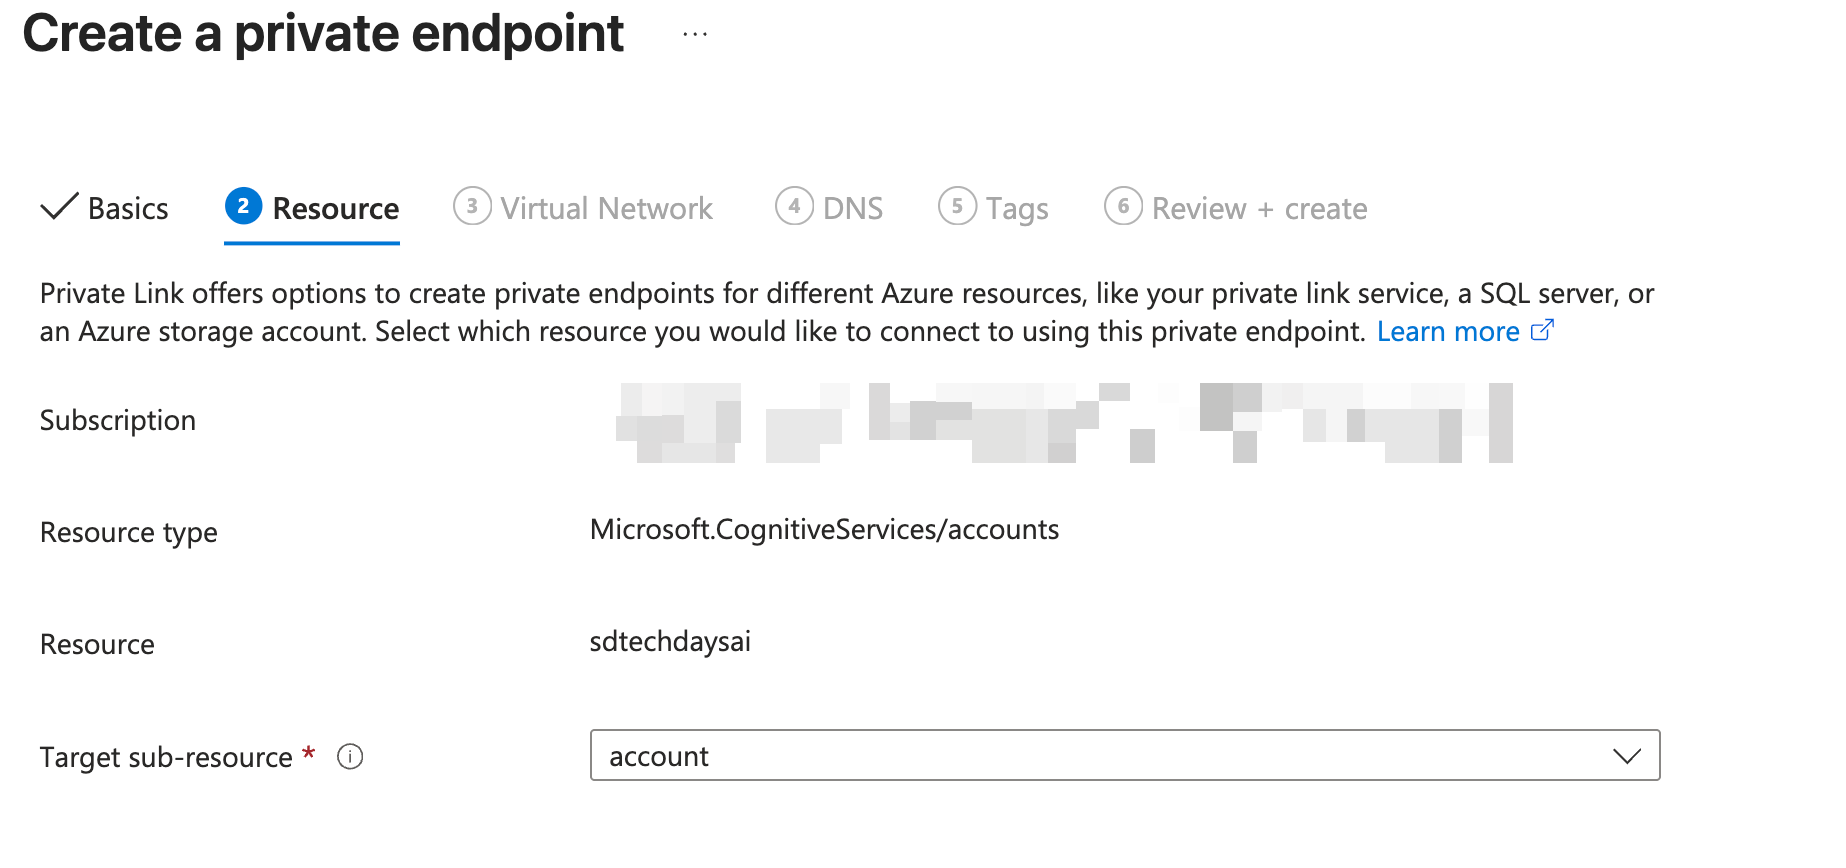
Resource tab:
- Resource type:
Microsoft.CognitiveServices/accounts - Resource: Select your Azure OpenAI resource.
- Target sub-resource: Select
account.
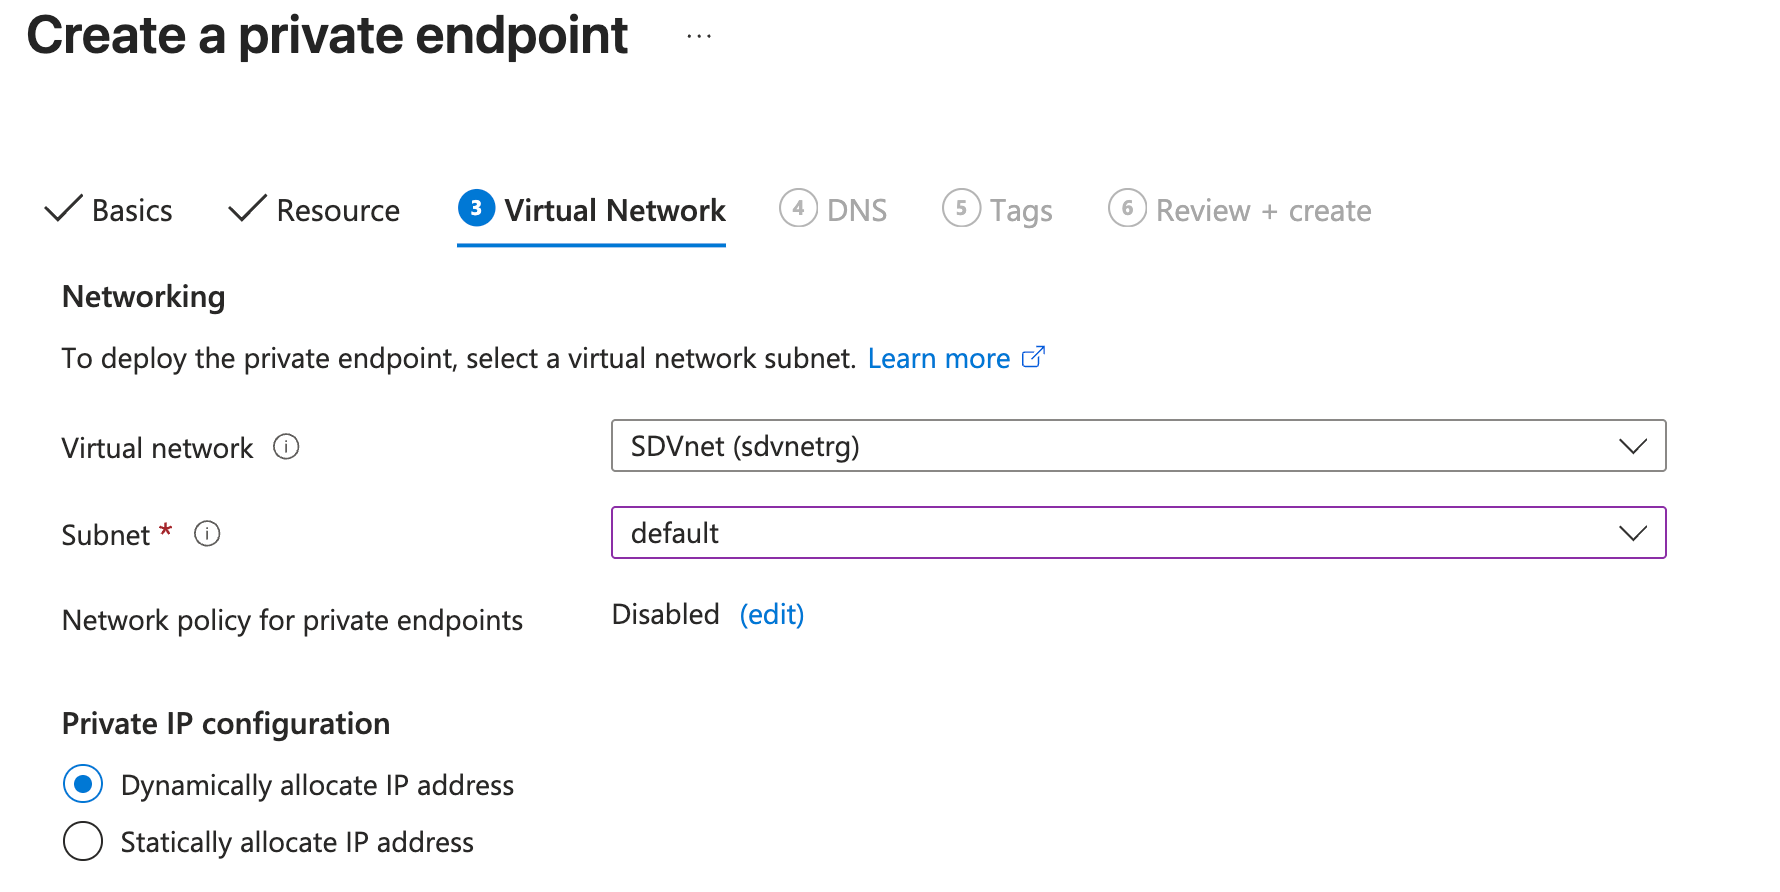
Virtual Network tab:
- Virtual network: Select your VNet.
- Subnet: Select
snet-private-endpoints. - Private IP configuration: Leave as default (
Dynamically allocate IP address).
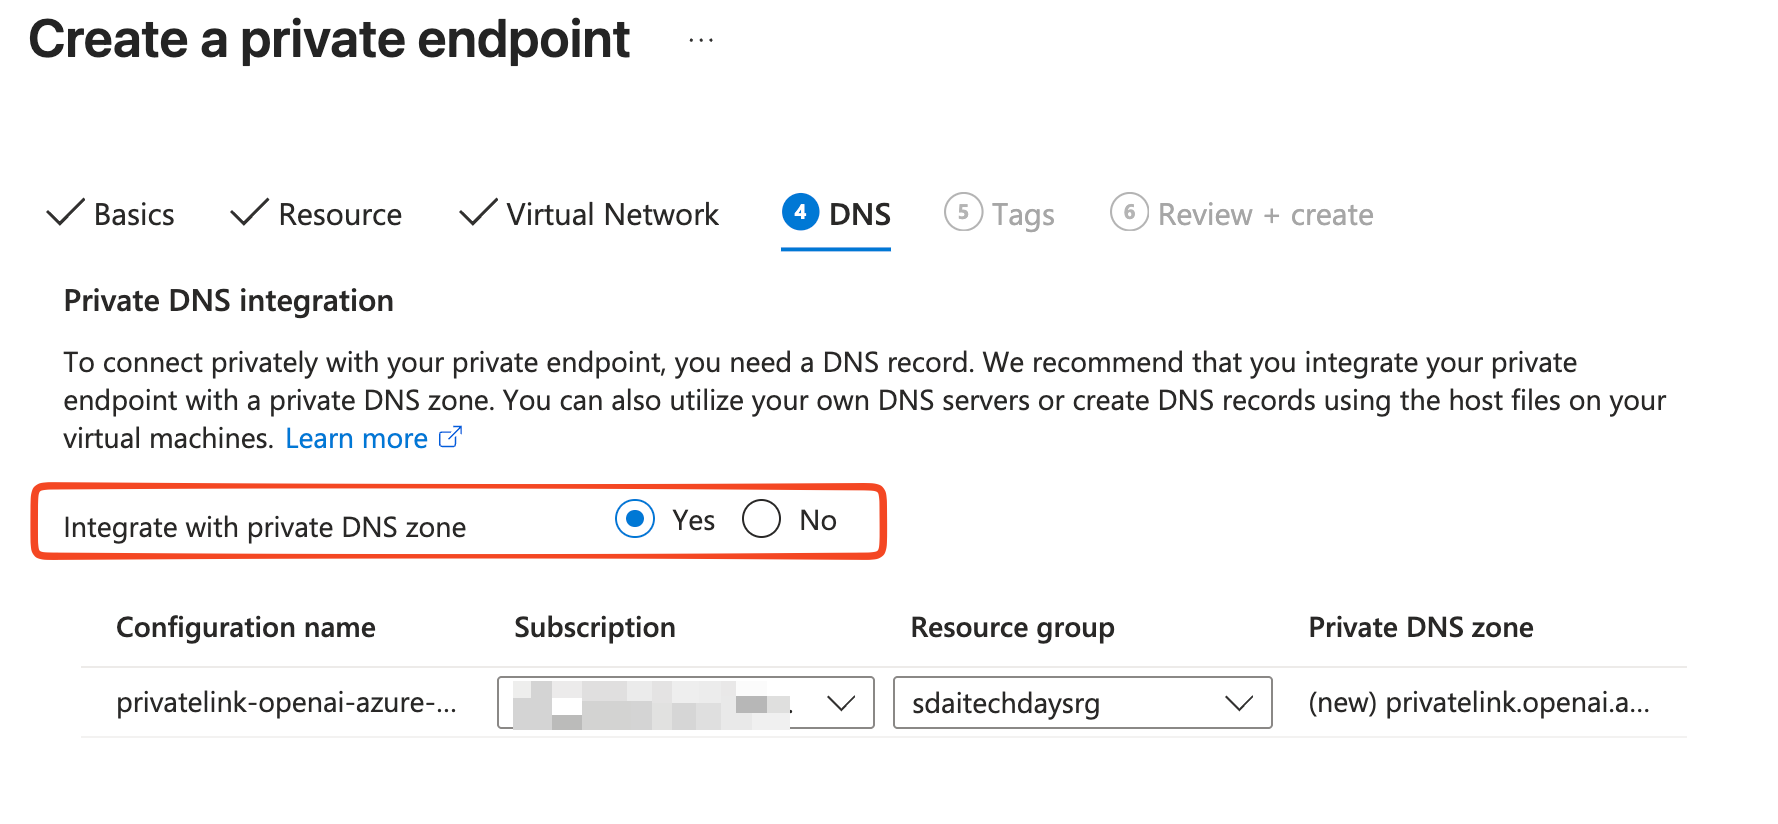
DNS tab:
- Integrate with private DNS zone: Select Yes.
- Azure will automatically create (or reuse) a Private DNS Zone named
privatelink.openai.azure.comand link it to your VNet. This is critical! Without it, DNS resolution from within the VNet will return the public IP, not the private one. - Confirm the Subscription and Resource group for the DNS zone are correct.
Review + create tab:
- Review all settings and click Create.
DNS resolution note: When the private endpoint is created, Azure updates the CNAME record for your OpenAI endpoint to point to *.privatelink.openai.azure.com. Resources inside the VNet will resolve this to the private IP assigned to the private endpoint. Resources outside the VNet will still see the public IP — but you will disable that in the next step.
Always use your Azure OpenAI custom subdomain endpoint URL (e.g., https://my-openai.openai.azure.com), never the internal *.privatelink.openai.azure.com URL directly. The custom subdomain is required for Microsoft Entra ID authentication.
After creation, on the Private endpoint connections tab of your Azure OpenAI Networking blade, confirm the connection status shows Approved. Note the private IP assigned to it (visible via the Network Interface link) — it will be something like 10.0.1.5.
Step 3: Disable Public Network Access on Azure OpenAI
Now that the private endpoint is in place and approved, you must lock down the Azure OpenAI resource to reject all public internet traffic.
On your Azure OpenAI resource, navigate to Networking in the left menu.
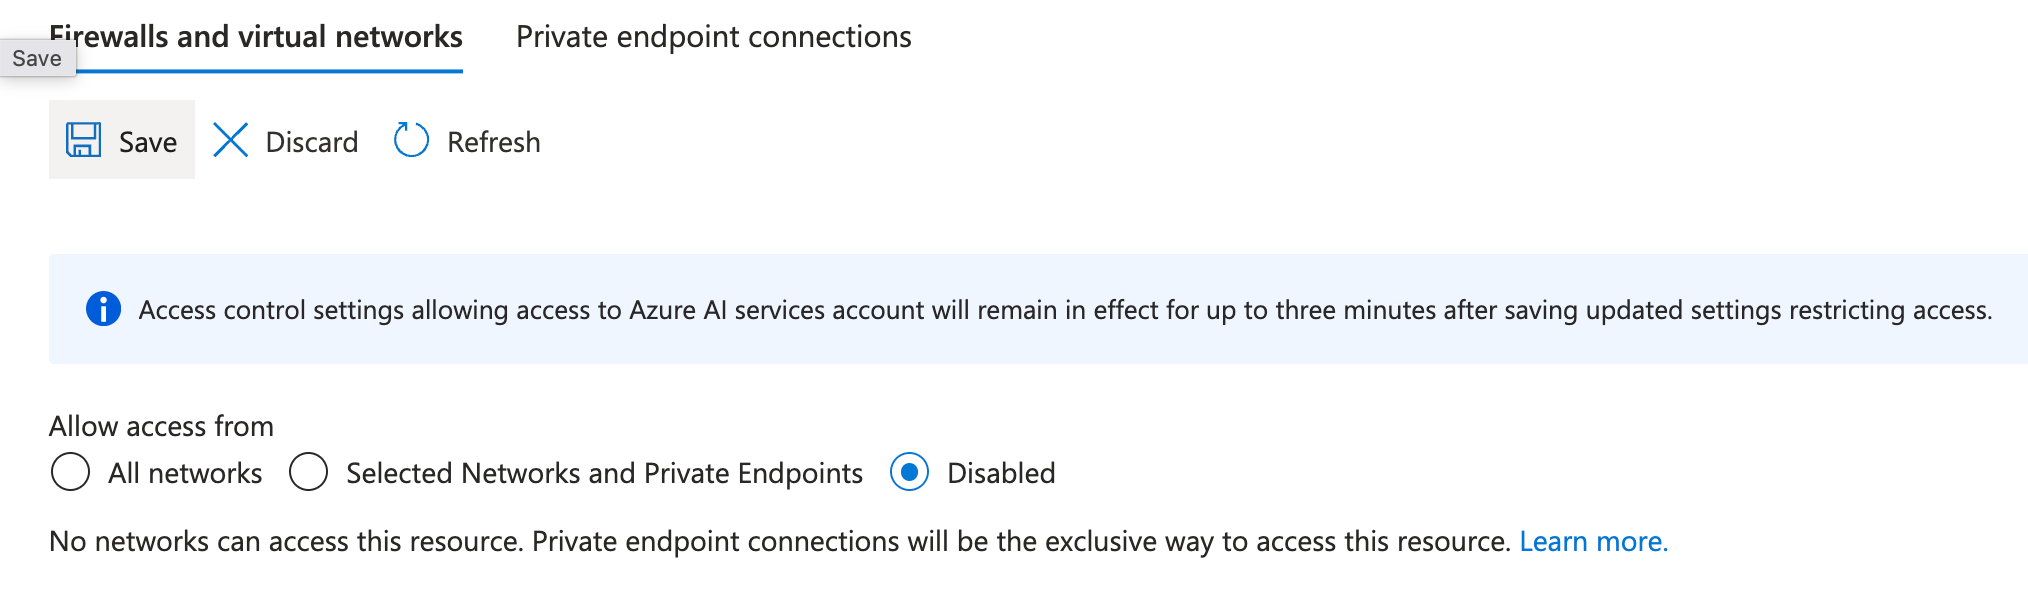
On the Firewalls and virtual networks tab:
- Under Allow access from, select Disabled (this disables all public access and allows only connections via private endpoints).
Click Save.
After this change, any call to the Azure OpenAI API from outside the VNet will be immediately rejected with a network error. This includes the Azure Portal’s Azure AI Foundry Playground, local development machines, and any external CI/CD tools, unless they are also connected to the VNet (via VPN, ExpressRoute, or a jumpbox VM in the VNet).
Step 4: Enable VNet integration on Logic Apps Standard
By default, outbound connections from Logic Apps Standard go to the internet. You need to integrate Logic Apps into your VNet so that all outbound traffic (including calls to Azure OpenAI) is routed through your private subnet, and thus through the private endpoint.
In the Azure Portal, navigate to your Logic Apps Standard resource. In the left menu, under Settings, select Networking.
On the Networking blade, under Outbound traffic, click Virtual network integration (or Not configured if it hasn’t been set up).
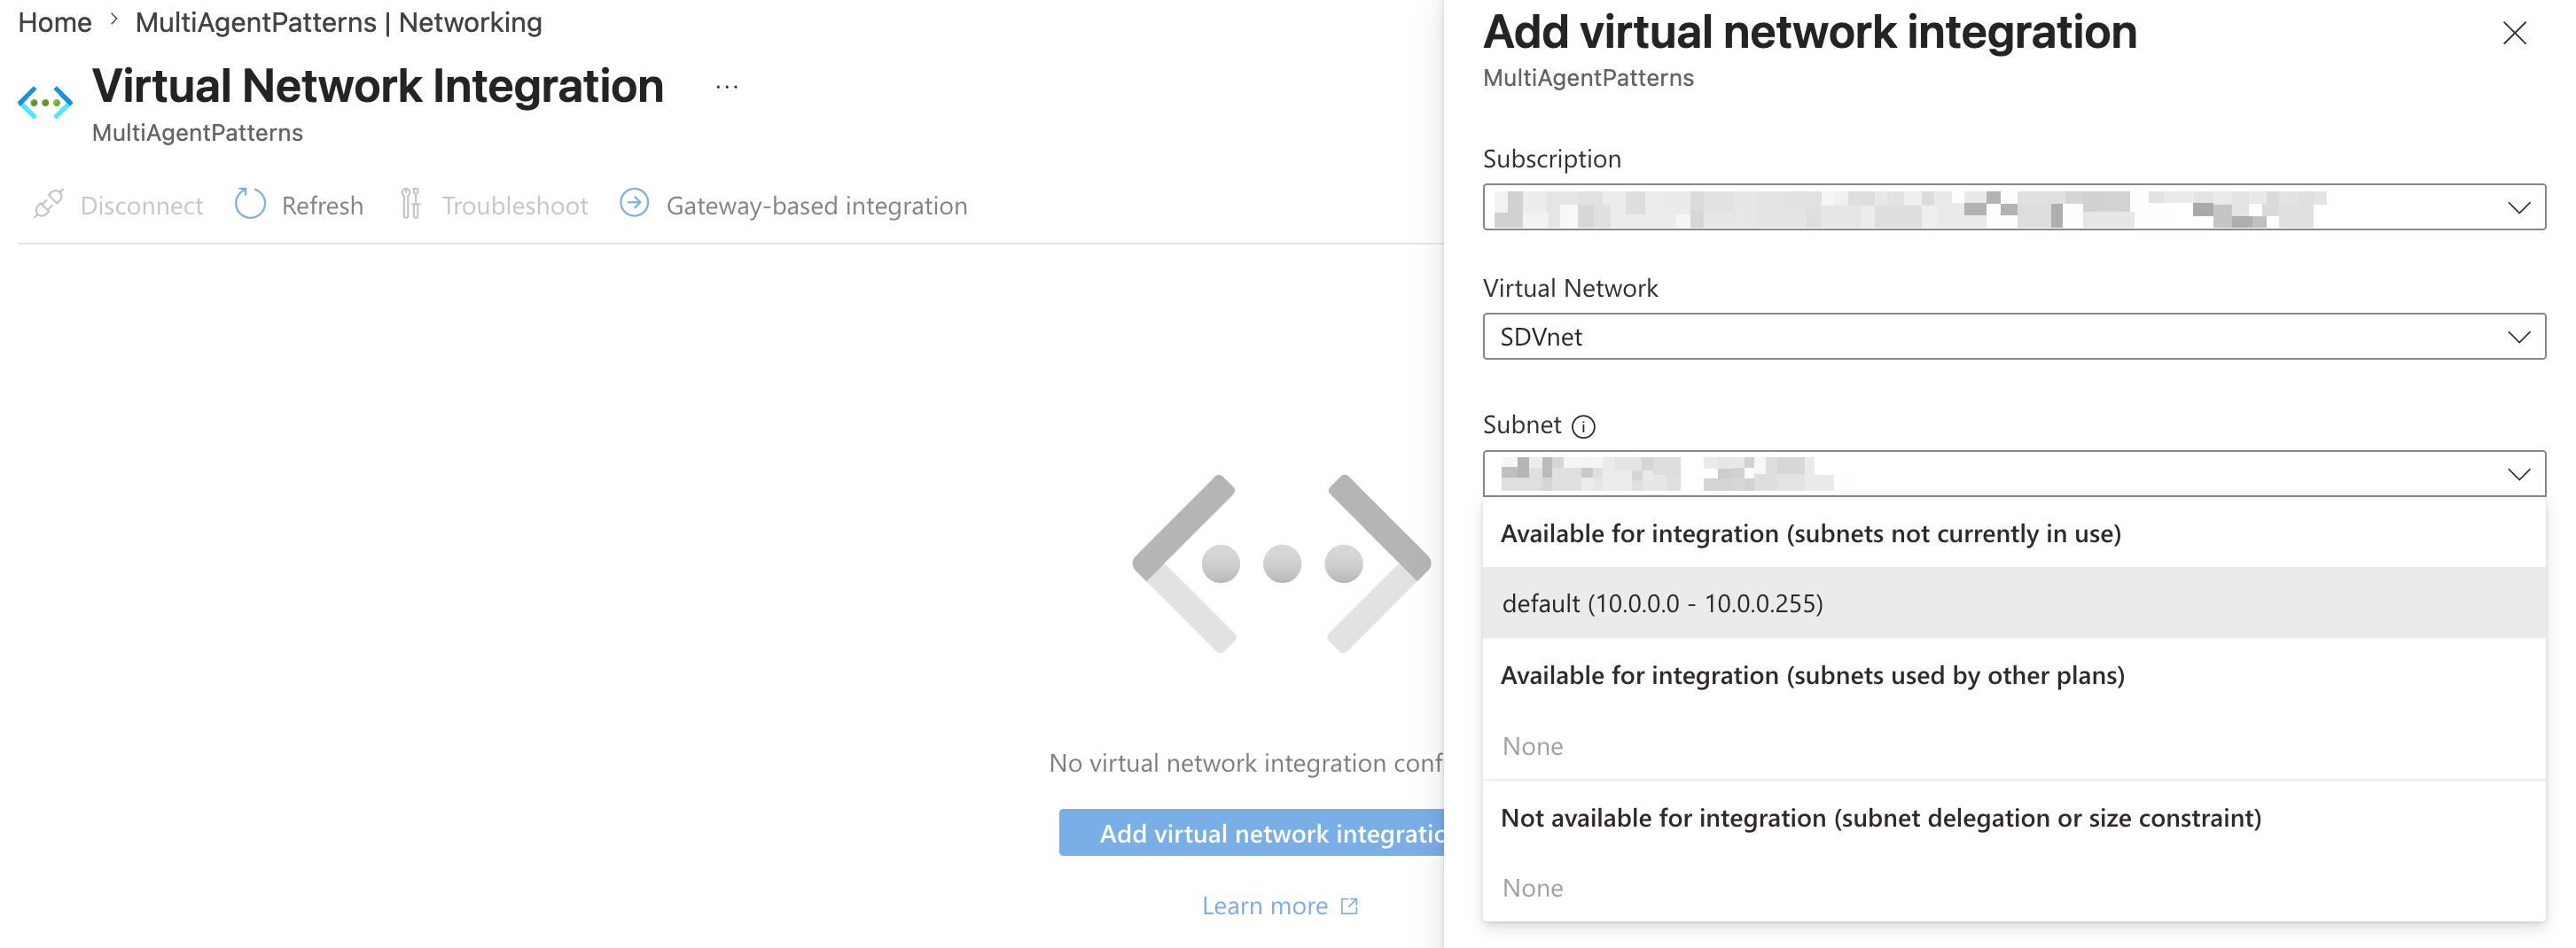
Click Add VNet integration (or + Add):
- Subscription: Your subscription.
- Virtual network: Select your VNet.
- Subnet: Select
snet-logic-apps-outbound(the delegated subnet you created in Step 1.3).
Click OK / Connect.
After enabling VNet integration, you must ensure that all outbound traffic (not just private IP traffic) is routed through the VNet.
On the Networking blade, under Virtual network integration, click on the integration you just created and look for Route All or Outbound internet traffic setting:
- Ensure Route All is set to Enabled (or Outbound internet traffic is set to Virtual network).
This ensures that traffic destined for your Azure OpenAI private endpoint (private IP 10.0.1.x) is routed through the VNet, not via a public internet path.
Built-in (in-app) connectors in Logic Apps Standard run in the same single-tenant environment as your workflow and fully respect VNet integration. Managed (shared) connectors run in the multi-tenant infrastructure and do not route through VNet integration. For private connectivity, always prefer built-in connectors where available.
Step 5: Enable System-Assigned Managed Identity on Logic Apps
Instead of using API keys to authenticate to Azure OpenAI (which require secret rotation and management), you should use a Managed Identity. Logic Apps Standard supports System-assigned Managed Identity, which automatically provides a Microsoft Entra ID identity to your Logic App without any credentials to manage.
On your Logic Apps Standard resource, in the left menu, under Settings, select Identity.
On the System assigned tab:
- Set the Status toggle to On.
- Click Save, then confirm when prompted.
Azure will create a service principal in your Entra ID tenant for this Logic App. Copy the Object (principal) ID.
Step 6: Assign the Cognitive Services OpenAI user role
You must grant your Logic App’s managed identity permission to call the Azure OpenAI API. The correct built-in role is Cognitive Services OpenAI User. To do that:
Open your Azure OpenAI resource in the Azure Portal. In the left menu, click Access control (IAM).
Click + Add → Add role assignment.
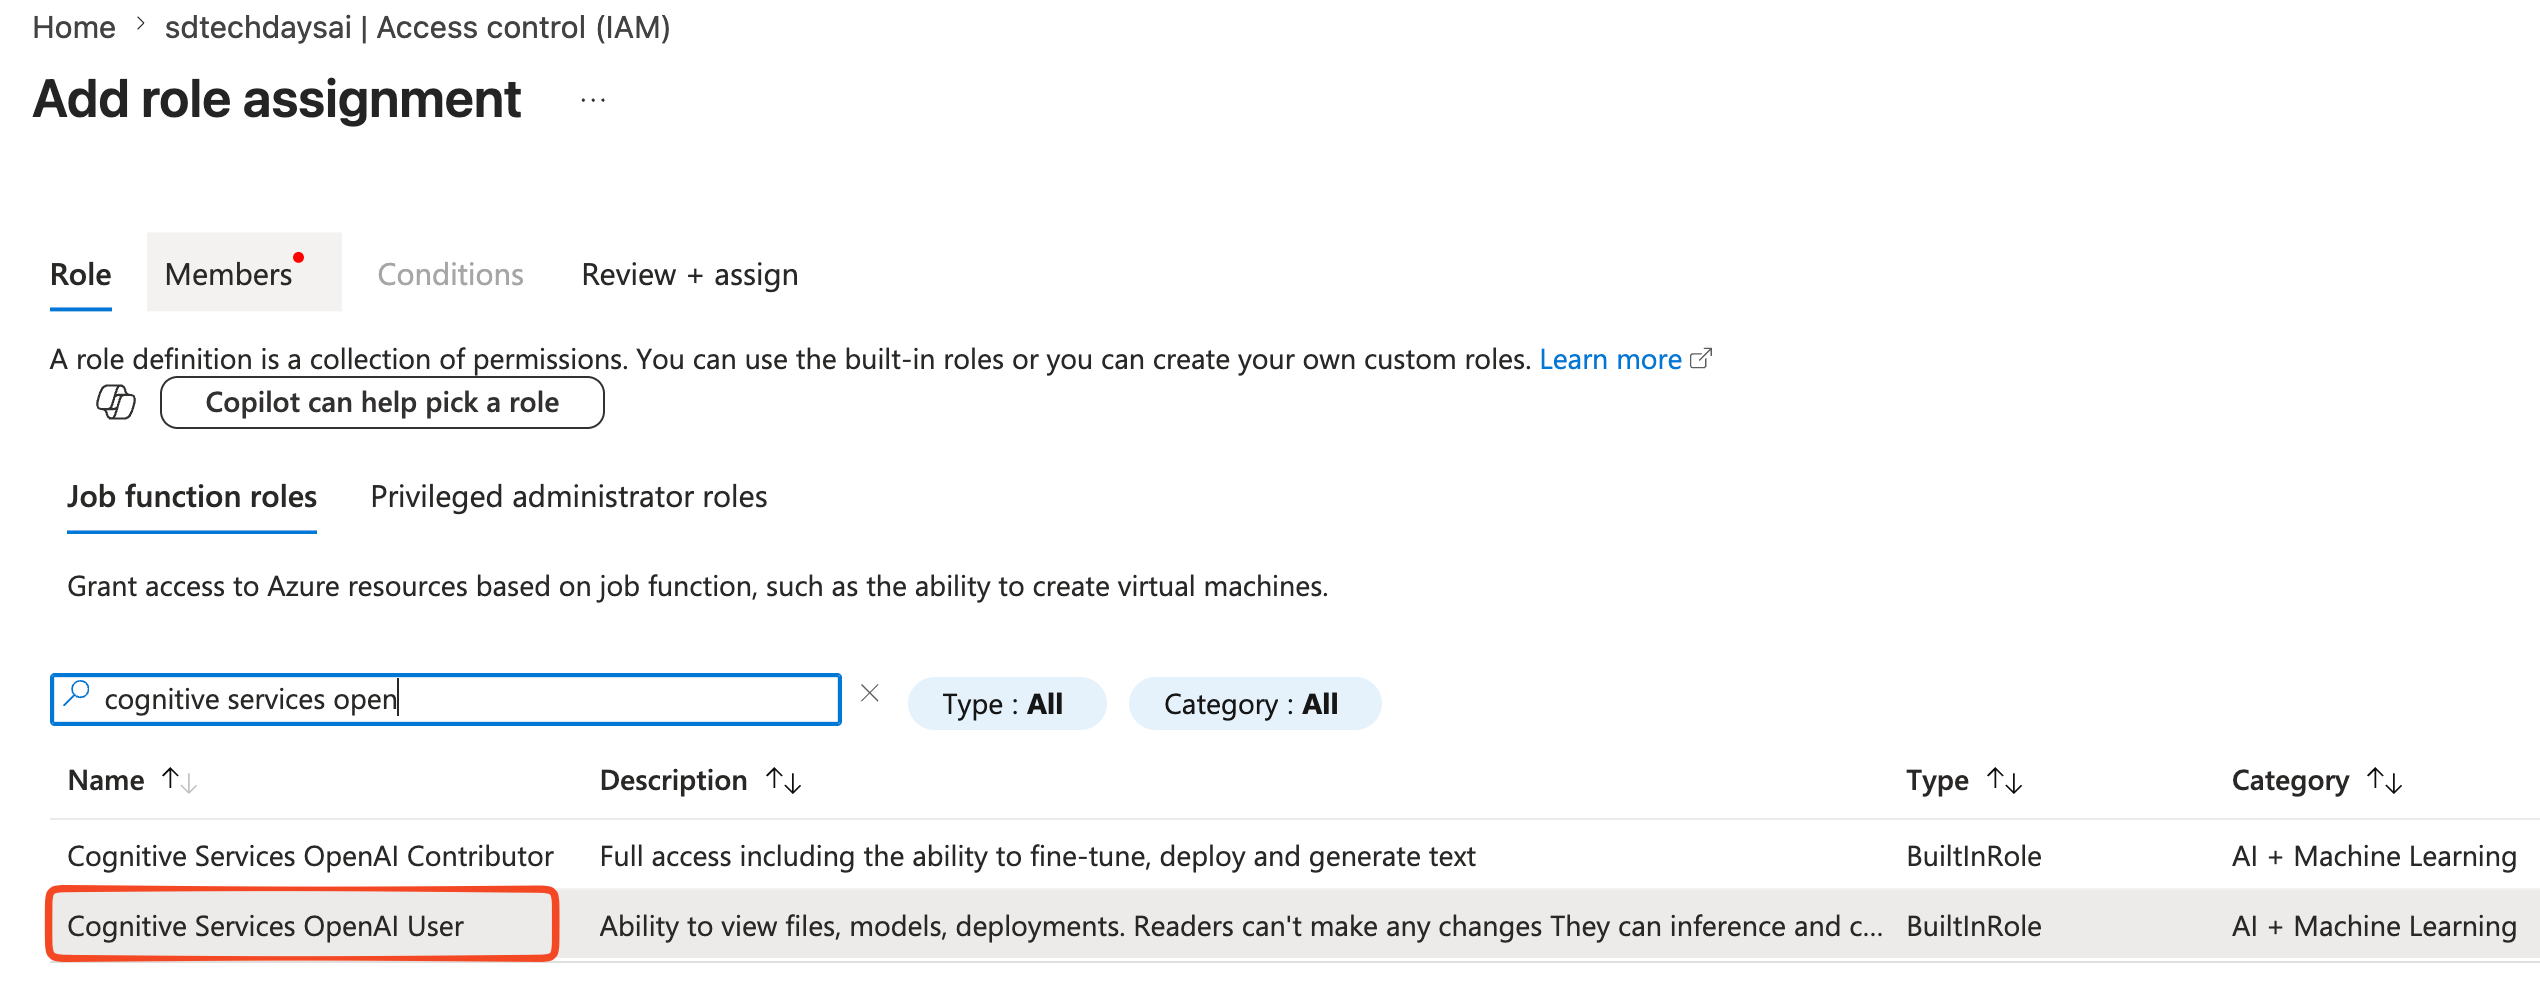
Role tab:
- Search for
Cognitive Services OpenAI User. - Select it and click Next.
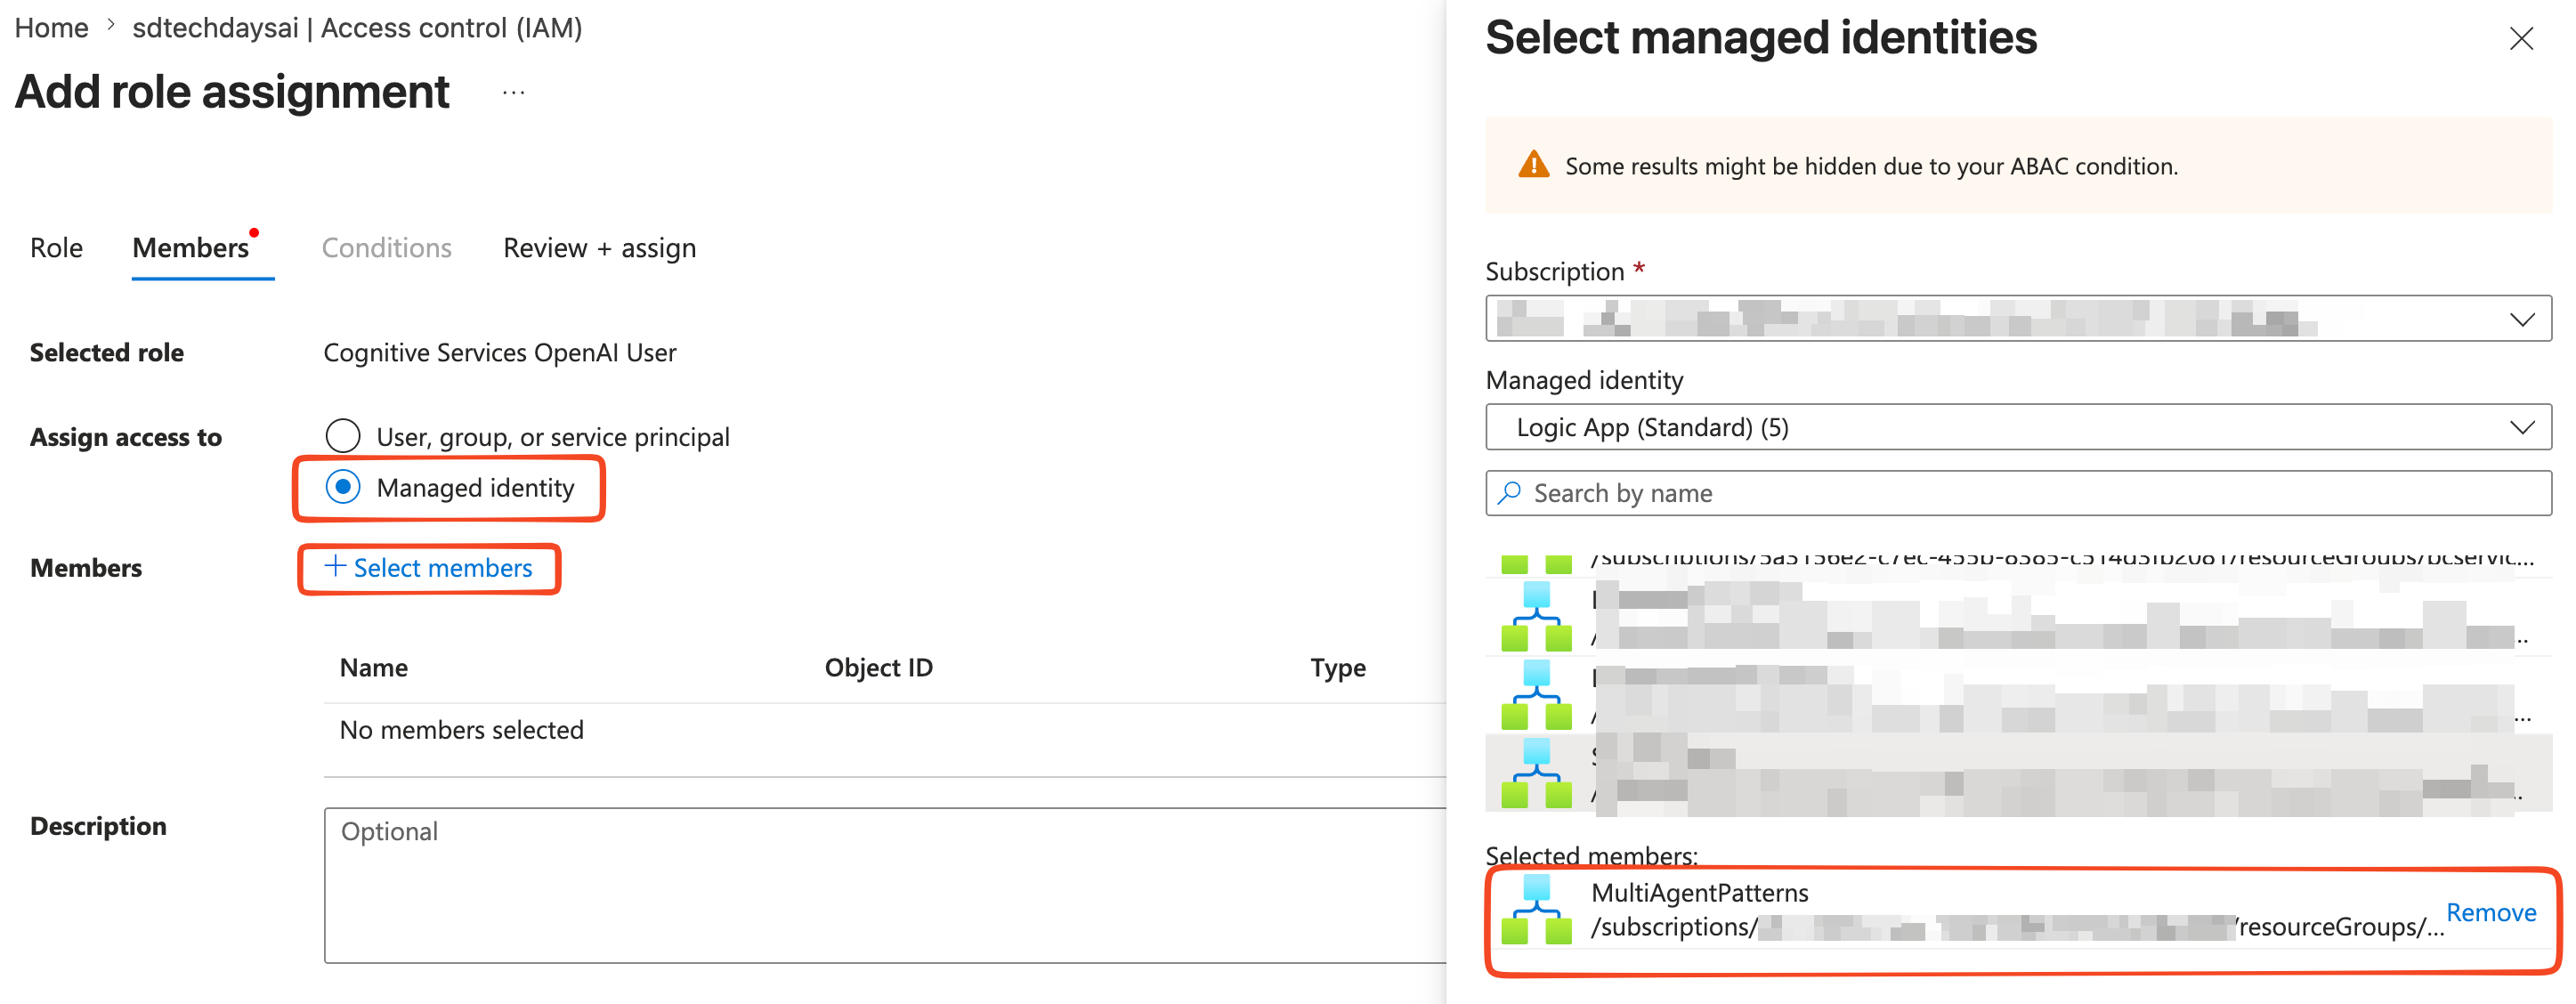
Members tab:
- Assign access to: Select Managed identity.
- Click + Select members.
- In the panel, select your subscription, select Logic App as the managed identity type, and find your Logic App Standard by name.
- Select it and click Select.
Review + assign tab:
- Review and click Review + assign twice to confirm.
NOTE: The Cognitive Services OpenAI User role grants the minimum required permissions: it allows the identity to call inference APIs (chat completions, embeddings, etc.) without granting any management-plane permissions (no ability to create or delete resources). This follows the principle of least privilege.
Step 7: Configure the Agent connection in Logic Apps designer
Now you wire everything together in the Logic Apps workflow designer.
In the Azure Portal, navigate to your Logic Apps Standard resource, then open the Workflows blade. Open your existing agent workflow (or create a new one with either the Conversational or Autonomous agent template).
Click on the Agent loop action title bar to open the configuration pane.
In the Create connection pane:
- Connection name: Give it a meaningful name, e.g.,
conn-openai-private. - Authentication type: Select Managed identity (NOT “API Key”. Using API keys bypasses the security model we’ve built).
- Model source: Select Azure OpenAI.
- Azure OpenAI resource: The portal will populate the available resources in your subscription. Select your Azure OpenAI resource.
- Deployment: Select the chat model deployment you want to use (e.g.,
gpt-4o).
Click Create new.
That’s all…
When the agent loop action calls Azure OpenAI, the Logic Apps Standard (running in your single-tenant environment) makes an outbound HTTP request to the Azure OpenAI endpoint URL (your custom subdomain, e.g., https://my-openai.openai.azure.com). This outbound traffic exits through the VNet integration subnet. Inside the VNet, DNS resolves my-openai.openai.azure.com to the private IP of the private endpoint (e.g., 10.0.1.5), not the public IP. The traffic flows privately over the Microsoft backbone (it never reaches the public internet).
To confirm DNS is resolving correctly from within the VNet, you can deploy a small test VM in the same VNet (any subnet) and run:
nslookup my-openai.openai.azure.com
The response should return the private IP of your private endpoint (e.g., 10.0.1.5), not a public IP. If it returns a public IP, your Private DNS Zone is not correctly linked to the VNet — go back to Step 2 and verify the DNS zone VNet link.
To verify the private endpoint connection state, in the Azure Portal, on your Azure OpenAI resource go to → Networking → Private endpoint connections and confirm the connection state is Approved.
You can now trigger your Logic Apps agent workflow (use the built-in chat test interface for conversational agents, or trigger manually for autonomous agents) and check the Run history to confirm the agent action completed successfully.
If everything is correctly in place, your Logic Apps agent now communicates with Azure OpenAI exclusively over private Microsoft backbone infrastructure. No traffic traverses the public internet. No API keys are stored or rotated. Authentication is handled by Entra ID through the managed identity.
