

Some days ago there was a discussion on Twitter started by Waldo about how to document custom Dynamics 365 Business Central APIsd to third-party clients that expects standard documentations like OpenAPI.
OpenAPI Specification (formerly Swagger Specification) is an API description format for REST APIs. An OpenAPI file allows you to describe your entire API, including:
- Available endpoints (
/users) and operations on each endpoint (GET /users,POST /users) - Operation parameters Input and output for each operation
- Authentication methods
- Contact information, license, terms of use and other information.
API specifications can be written in YAML or JSON. The format is easy to learn and readable to both humans and machines.
My very quick response to Waldo’s message on that thread was “you can embed your custom API on Azure API Management and you have OpenAPI out of the box“, but I’m the first to say that if your goal is ONLY to have OpenAPI definition, maybe using the open source Microsoft’s OpenAPI.NET.OData library is the easy way to go and Waldo has well described the process in this post.
So, was my response wrong? No. But there are other more important reasons for using Azure API Management together with Dynamics 365 Business Central APIs on real-world scenarios than only having OpenAPI documentation, and this is the real reason for this (quite long, sorry) post.
In simple words, Azure API Management is a fully managed service that enables customers to publish, secure, transform, maintain, and monitor APIs on Azure.
Azure API Management is primarily used to provide a central interface to create, provision and manage API for web and cloud applications and services. With Azure API Management user can monitor the health of APIs, identifying errors, configure throttling, rate limits, security and more on each API.
For this post, I will use an existing custom API that I have on my demo tenant (the ShoppingReservations API that I’ve used on my latest webcasts for Microsoft WE, maybe someone of you remember this). This custom API permits you to perform CRUD operations on the Shopping Reservation custom table in Business Central and the API responds to the following endpoint:
https://api.businesscentral.dynamics.com/v2.0/TENANTID/ENVIRONMENTNAME/api/sd/custom/v1.0/companies(COMPANYID)/shoppingreservations
To start using Azure API Management with Dynamics 365 Business Central APIs, you need to have a provisioned instance of the API Management service on your Azure subscription.
When the service instance is up and running, click on APIs, then on Add API and then select Blank API:
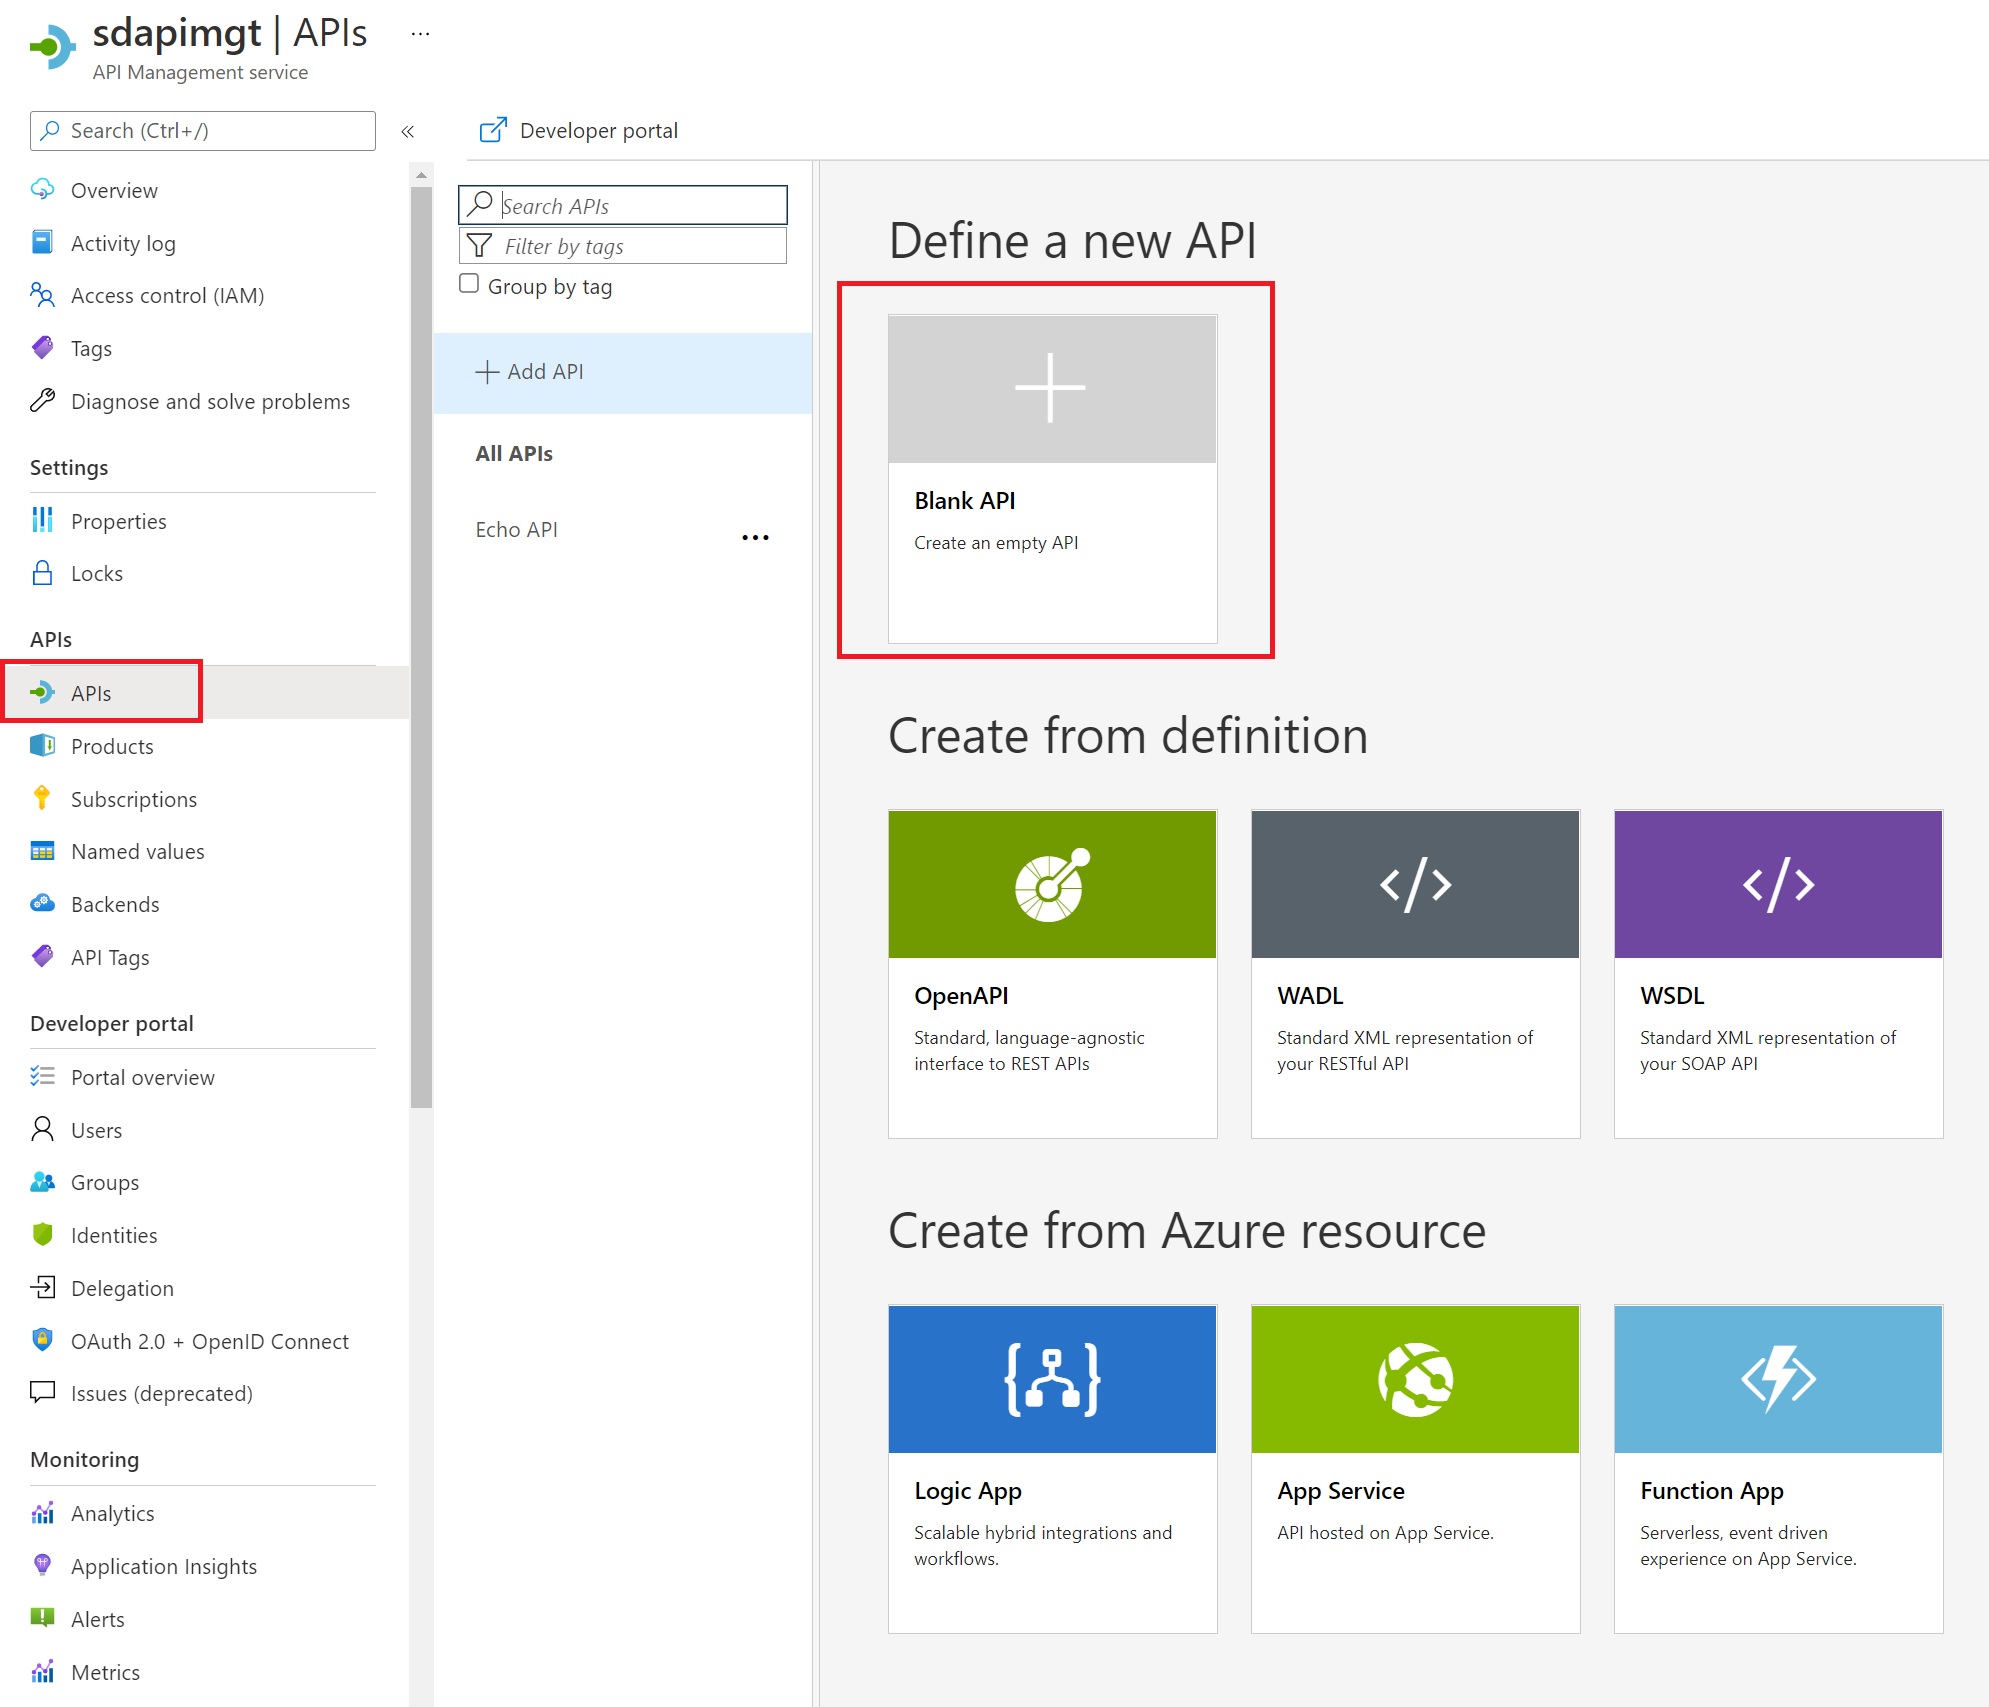
Here we will create a new API definition from scratch.
In the Create a blank API page, select the name of your API (in my case it will be called ShoppingReservations), select the URL of the API (it must be the Dynamics 365 Business Central API endpoint without the entity name) and then place the entity name into the API URL suffix field:

Click on Create and a new API definition is created, with an external endpoint (that in my case is https://sdapimgt.azure-api.net/shoppingreservations) and a backend andpoint ( Dynamics 365 Business Central endpoint, not visible to the outside world):

Now we need to define Operations (methods that our API definition will expose to the external clients). For this, select the ShoppingReservations API definition, click on Add Operation and in the Frontend panel set the operation detail. Here as a first step we want to create a GET method called shoppingreservations that retrieves the Shopping Reservations entities from Dynamics 365 Business Central:

When defined, click on Save.
Now select the Settings panel and here is where we can select the protocol, the API Url suffix and the authentication type:
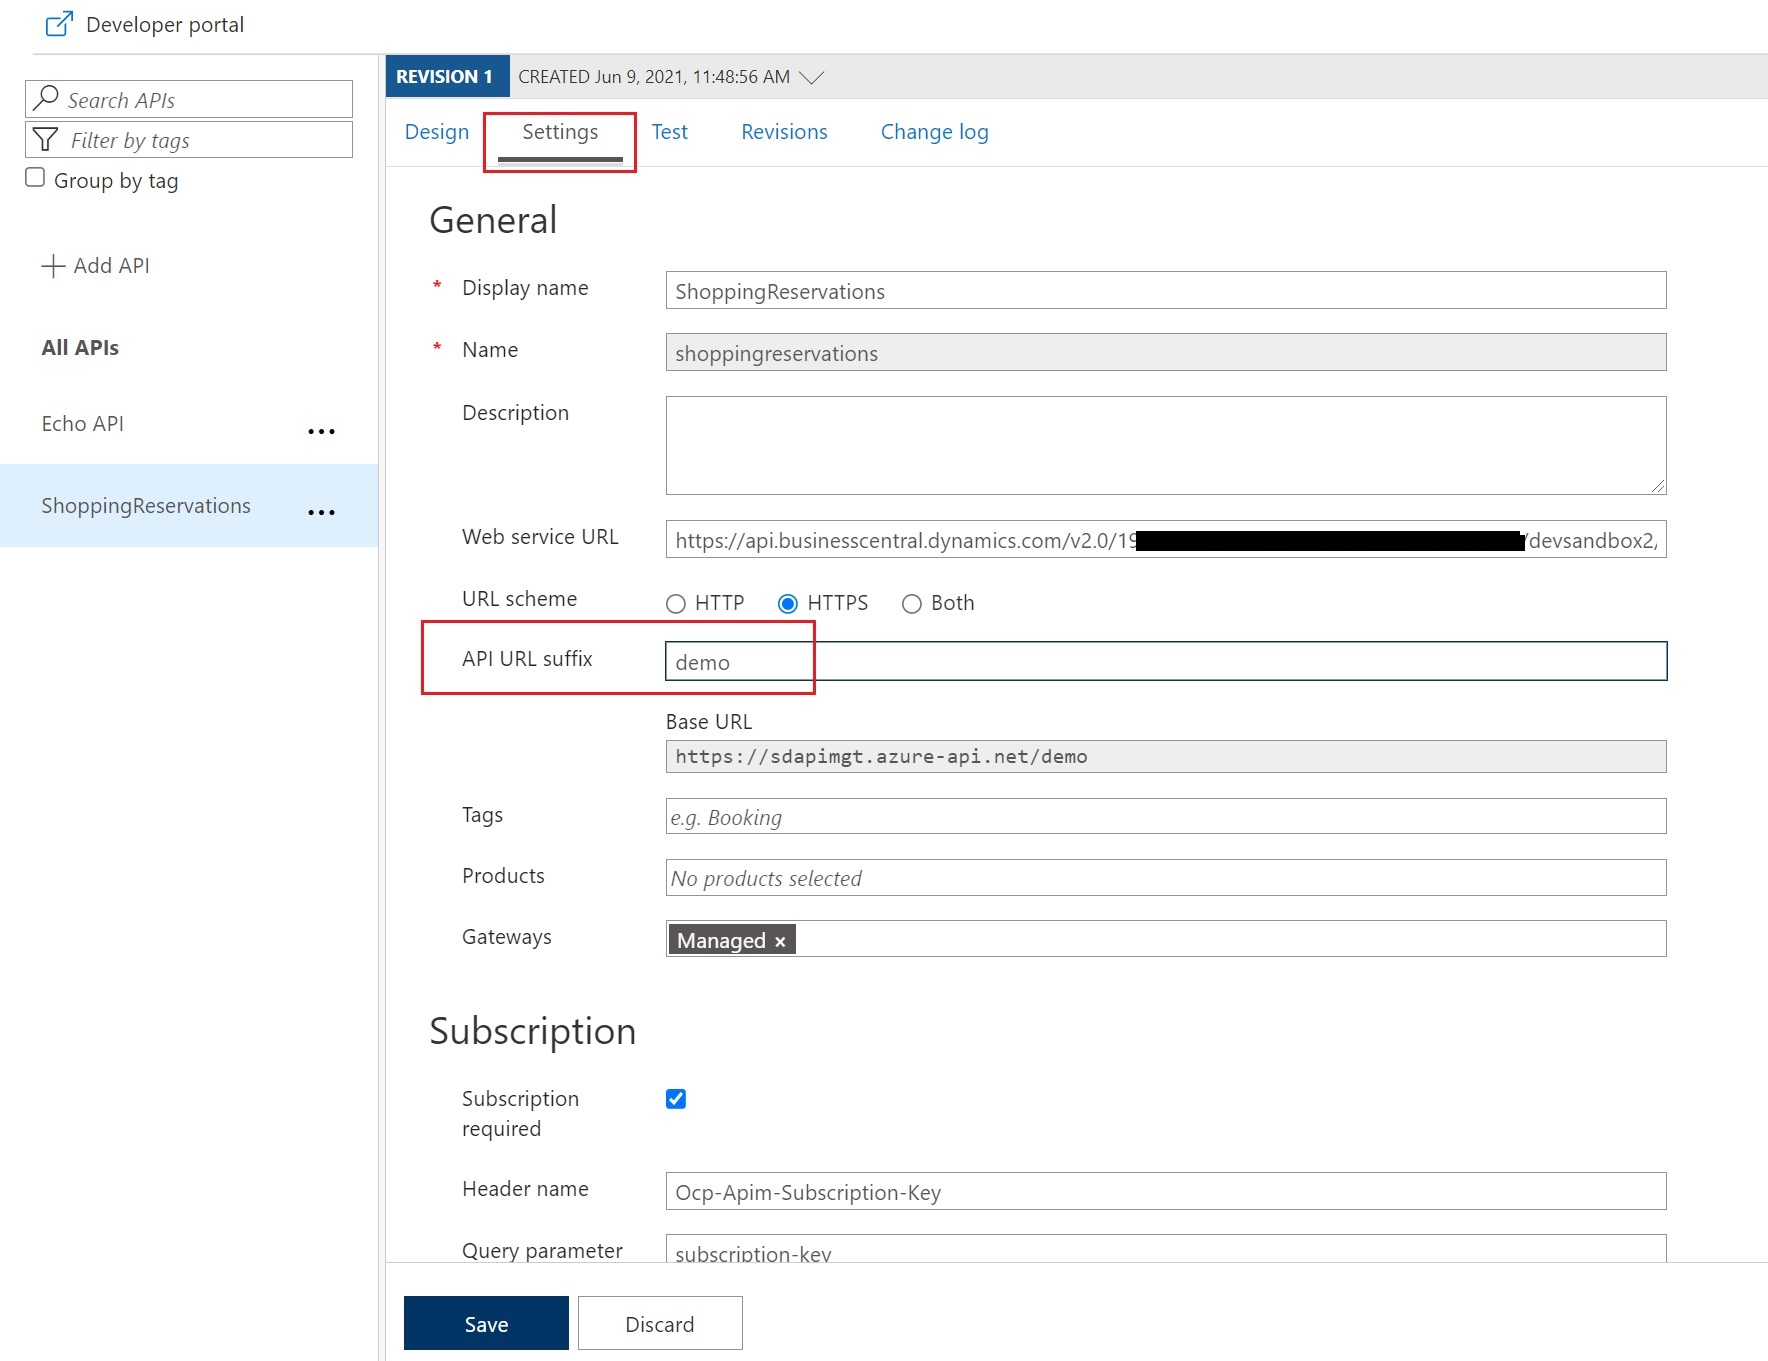
As default, Azure API Management uses subscription keys for authentication (see Subscription required flag in the above image), but you can change and use other authentication protocols like OAuth 2.0 or OpenId.
When the GET method is defined, you can click on the Test panel and from here you can test the method:
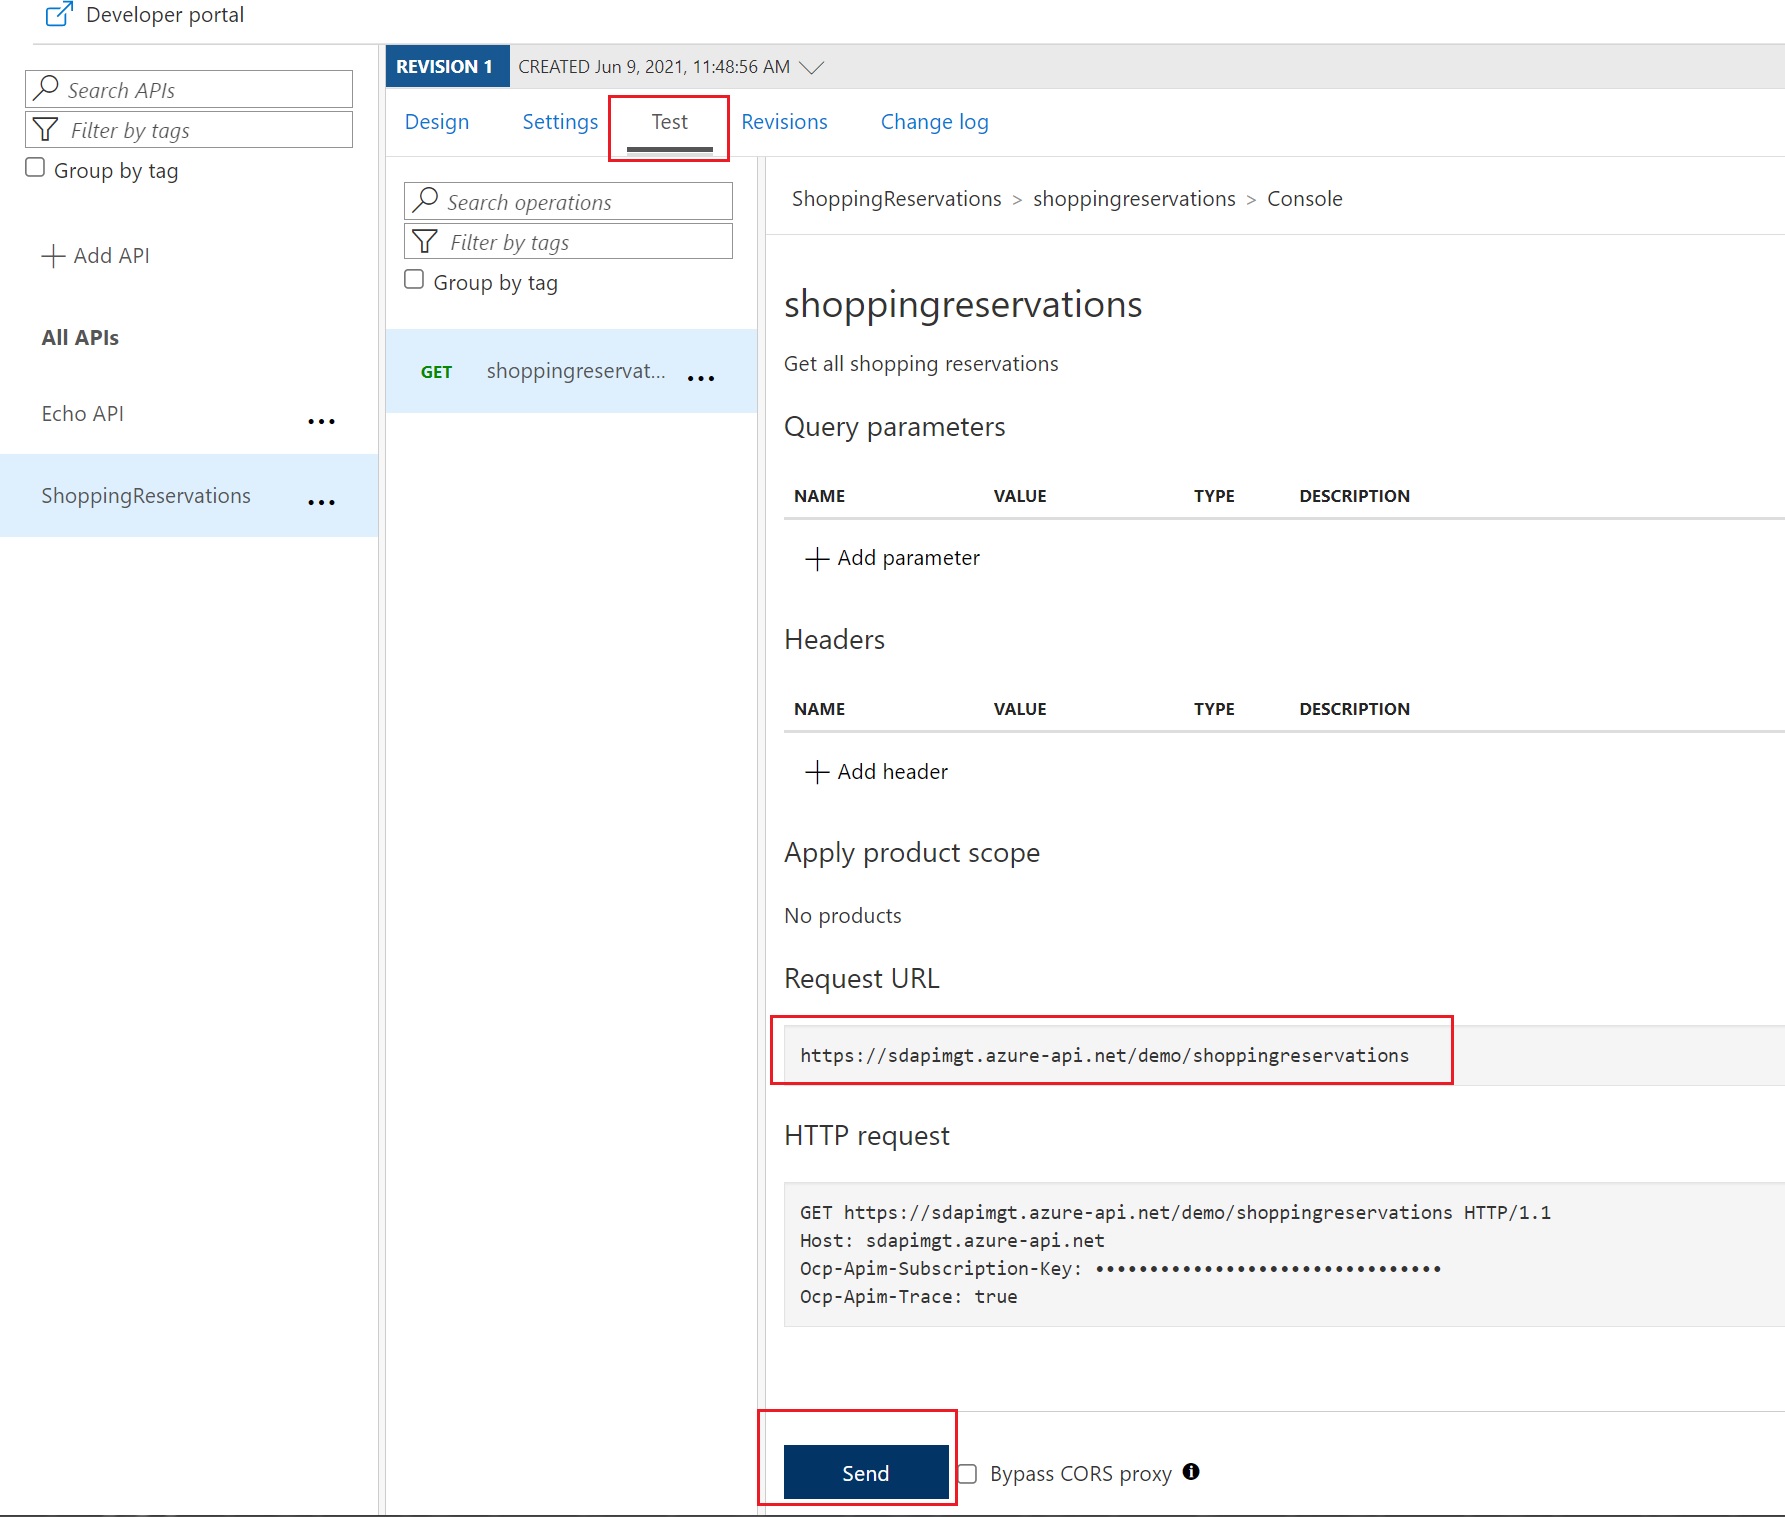
When you test the previously created GET method, you receive the HTTP 401 – Unauthorized error:

This is because in order to use the Dynamics 365 Business Central APIs, you need to pass authentication to Business Central. To do that, select All operations and then add an Inbound processing policy:

Here you can add a lot of pre-defined policies to control the inbound parameters of your APIs, but for our scope select Other policies:
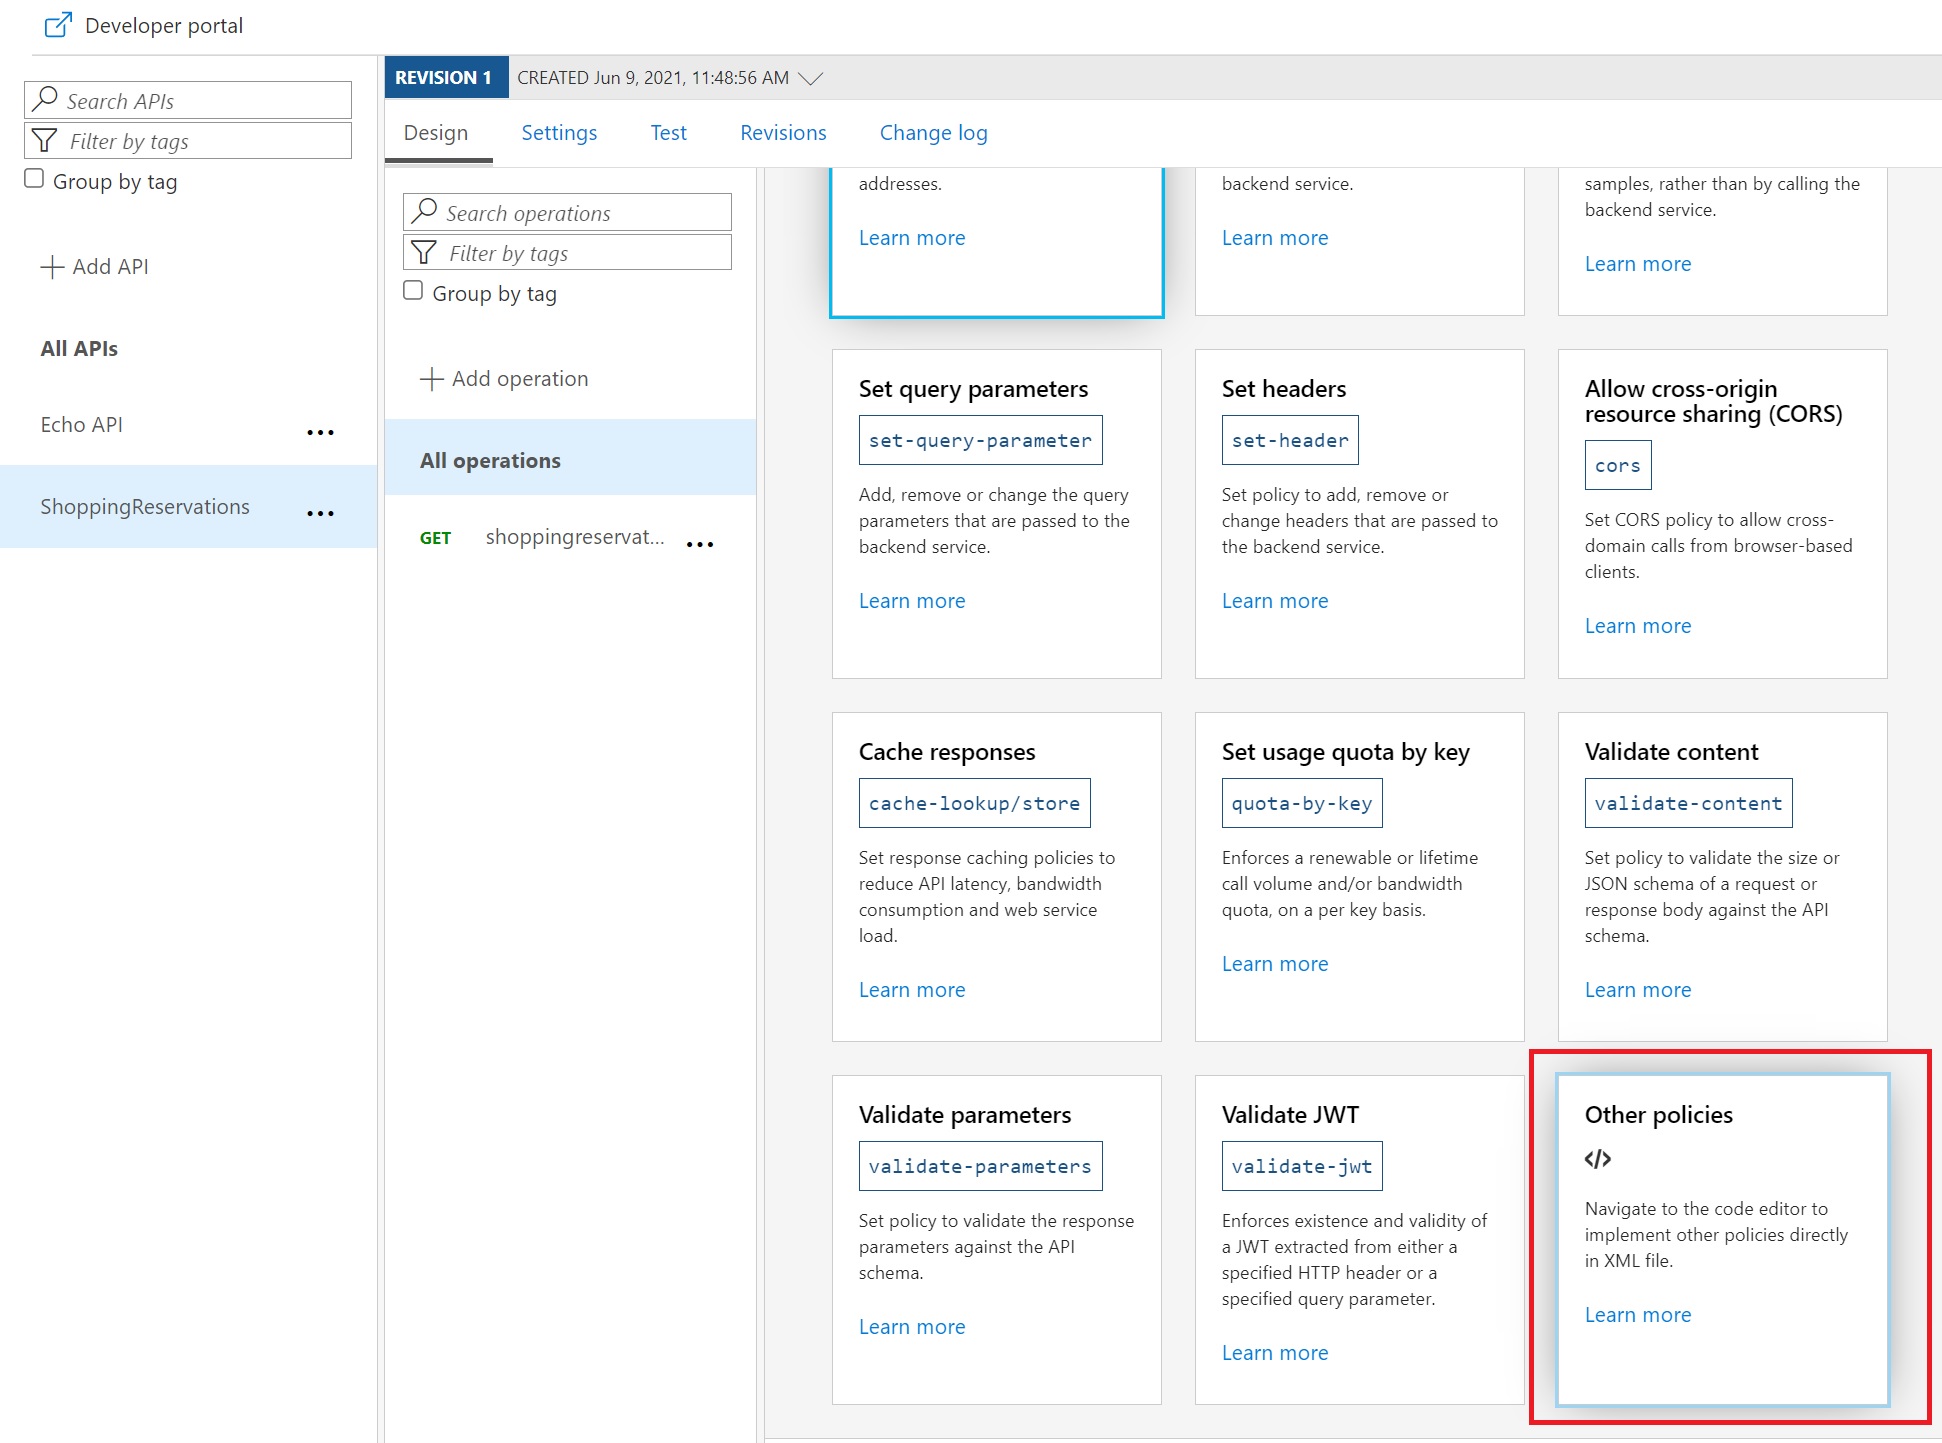
For this sample we will use Basic Authentication, so add a policy definition like the following (these will be the credentials for accessing Dynamics 365 Busines Central APIs):

As said before, you can also use OAuth2 and configure a rule that acquires a token via OAuth2 and then forward it to the backend (see here).
If you now test again the GET method, magically you have the response from Dynamics 365 Business Central (you receive HTTP 200 and the JSON data of the response):

Now click on Generate definition and in the Create new definition window, select a definition name (here I’ve called it reservations):

Select the Save as definition for this response flag and click on Create definition. In this way you’ve specified that your API will be called with a GET operation and it will return reservations objects:

If you select the Design tab in the defined GET method and then you scroll down on the Responses section, you can see that a new 200 OK response is added:

The sample field contains a JSON sample of the API response, but you can remove it.
Now we want to define a method for inserting Shopping Reservations on Business Central. To do that, we need to perform a POST operation to the Dynamics 365 Business Central API endpoint by passing a JSON body with the reservation data to create. The JSON body will be something like the following:
{
      "customer": "10000",
      "shopID": "SHOP A",
      "startTime": "2021-06-15T09:00:00Z",
      "endTime": "2021-06-15T22:00:00Z",
      "confirmed": true
}
As previously done, select the ShoppingReservations API definition, click on Add operation and then define a new operation called create-shopping-reservation where the method is POST and the API endpoint is shoppingreservations.
Here the header must have Content-Type = application/json, so click on Headers and set a new header parameter called content-type with value = application/json:

Now click on Requests, set Content Type parameter = application/json, then click on Definition and select New definition:

Here select a name for your definition (here called New Reservation Request), paste the JSON body for the API request and select the Auto-generate payload from sample flag, then click on Create definition:

As you can see, a new POST method is defined. In the Frontend definition you can see that this method has a content-type parameter in the header and wants a New Reservation Request object in the body:

If you test the API method, you can see that the answer is HTTP 201 – Created and a new Shopping Reservation record is created on Business Central:

Again, click on Generate definition and create a new definition (here called NewReservationResponse), select the Save as definition for this response flag and click on Create Definition:
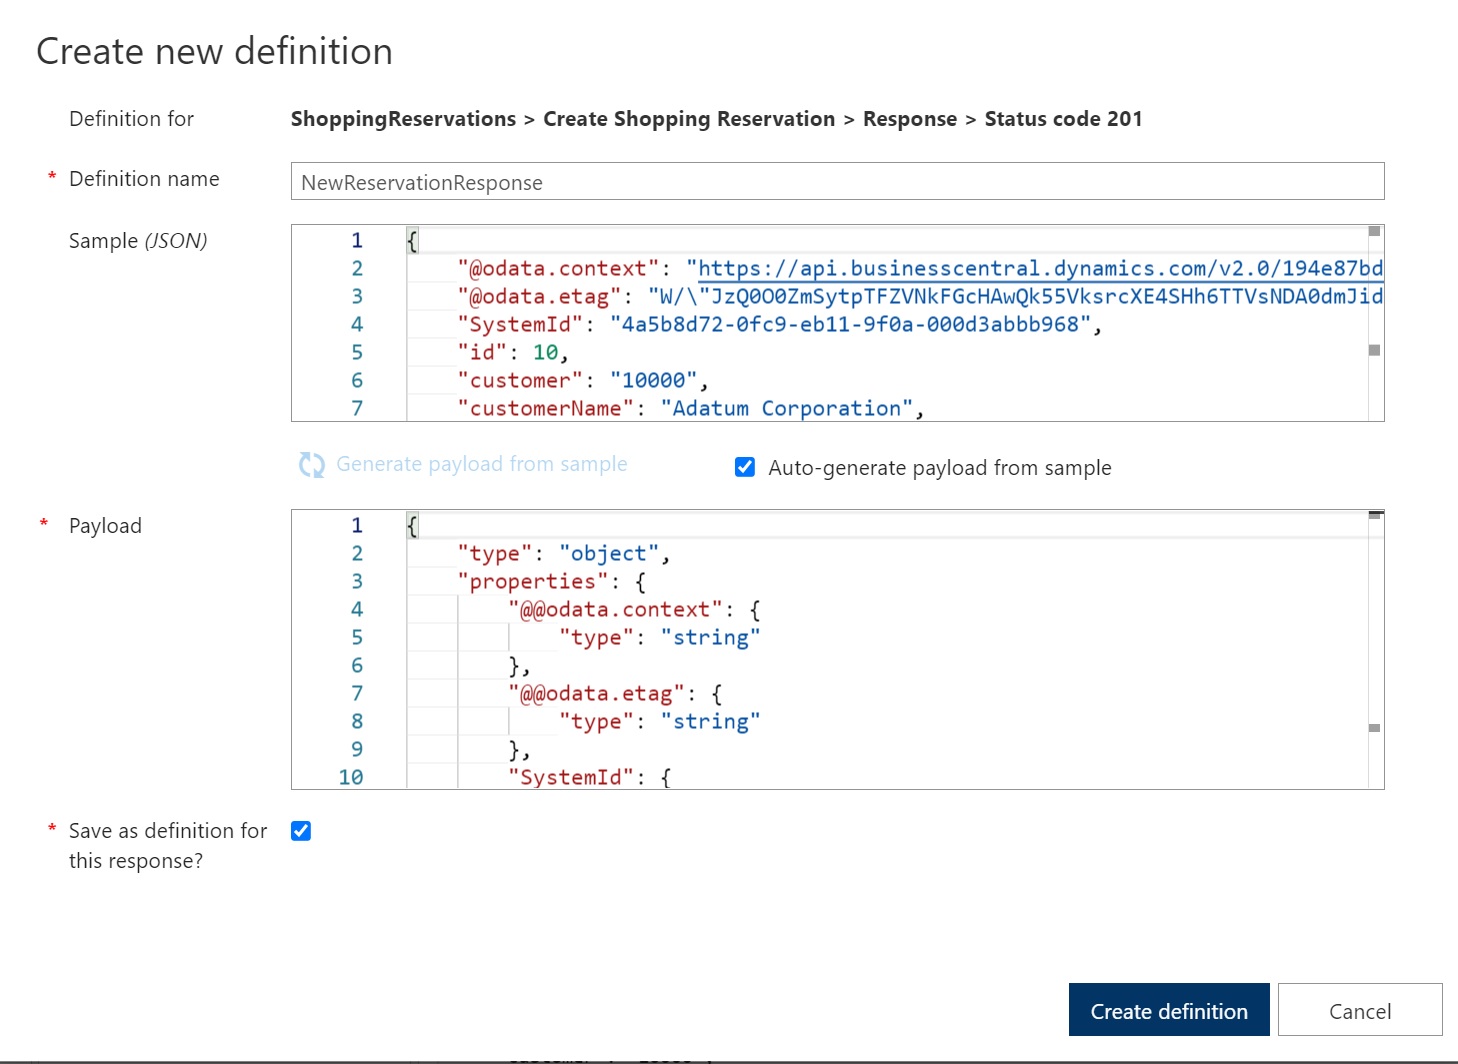
This will create a new object definition for our API method. As you can see, this method receives a New Reservation Request object and returns a NewReservationResponse object definition:

You can define all the methods you want for your API definition.
As said before, on the Settings panel you can set the authentication type:

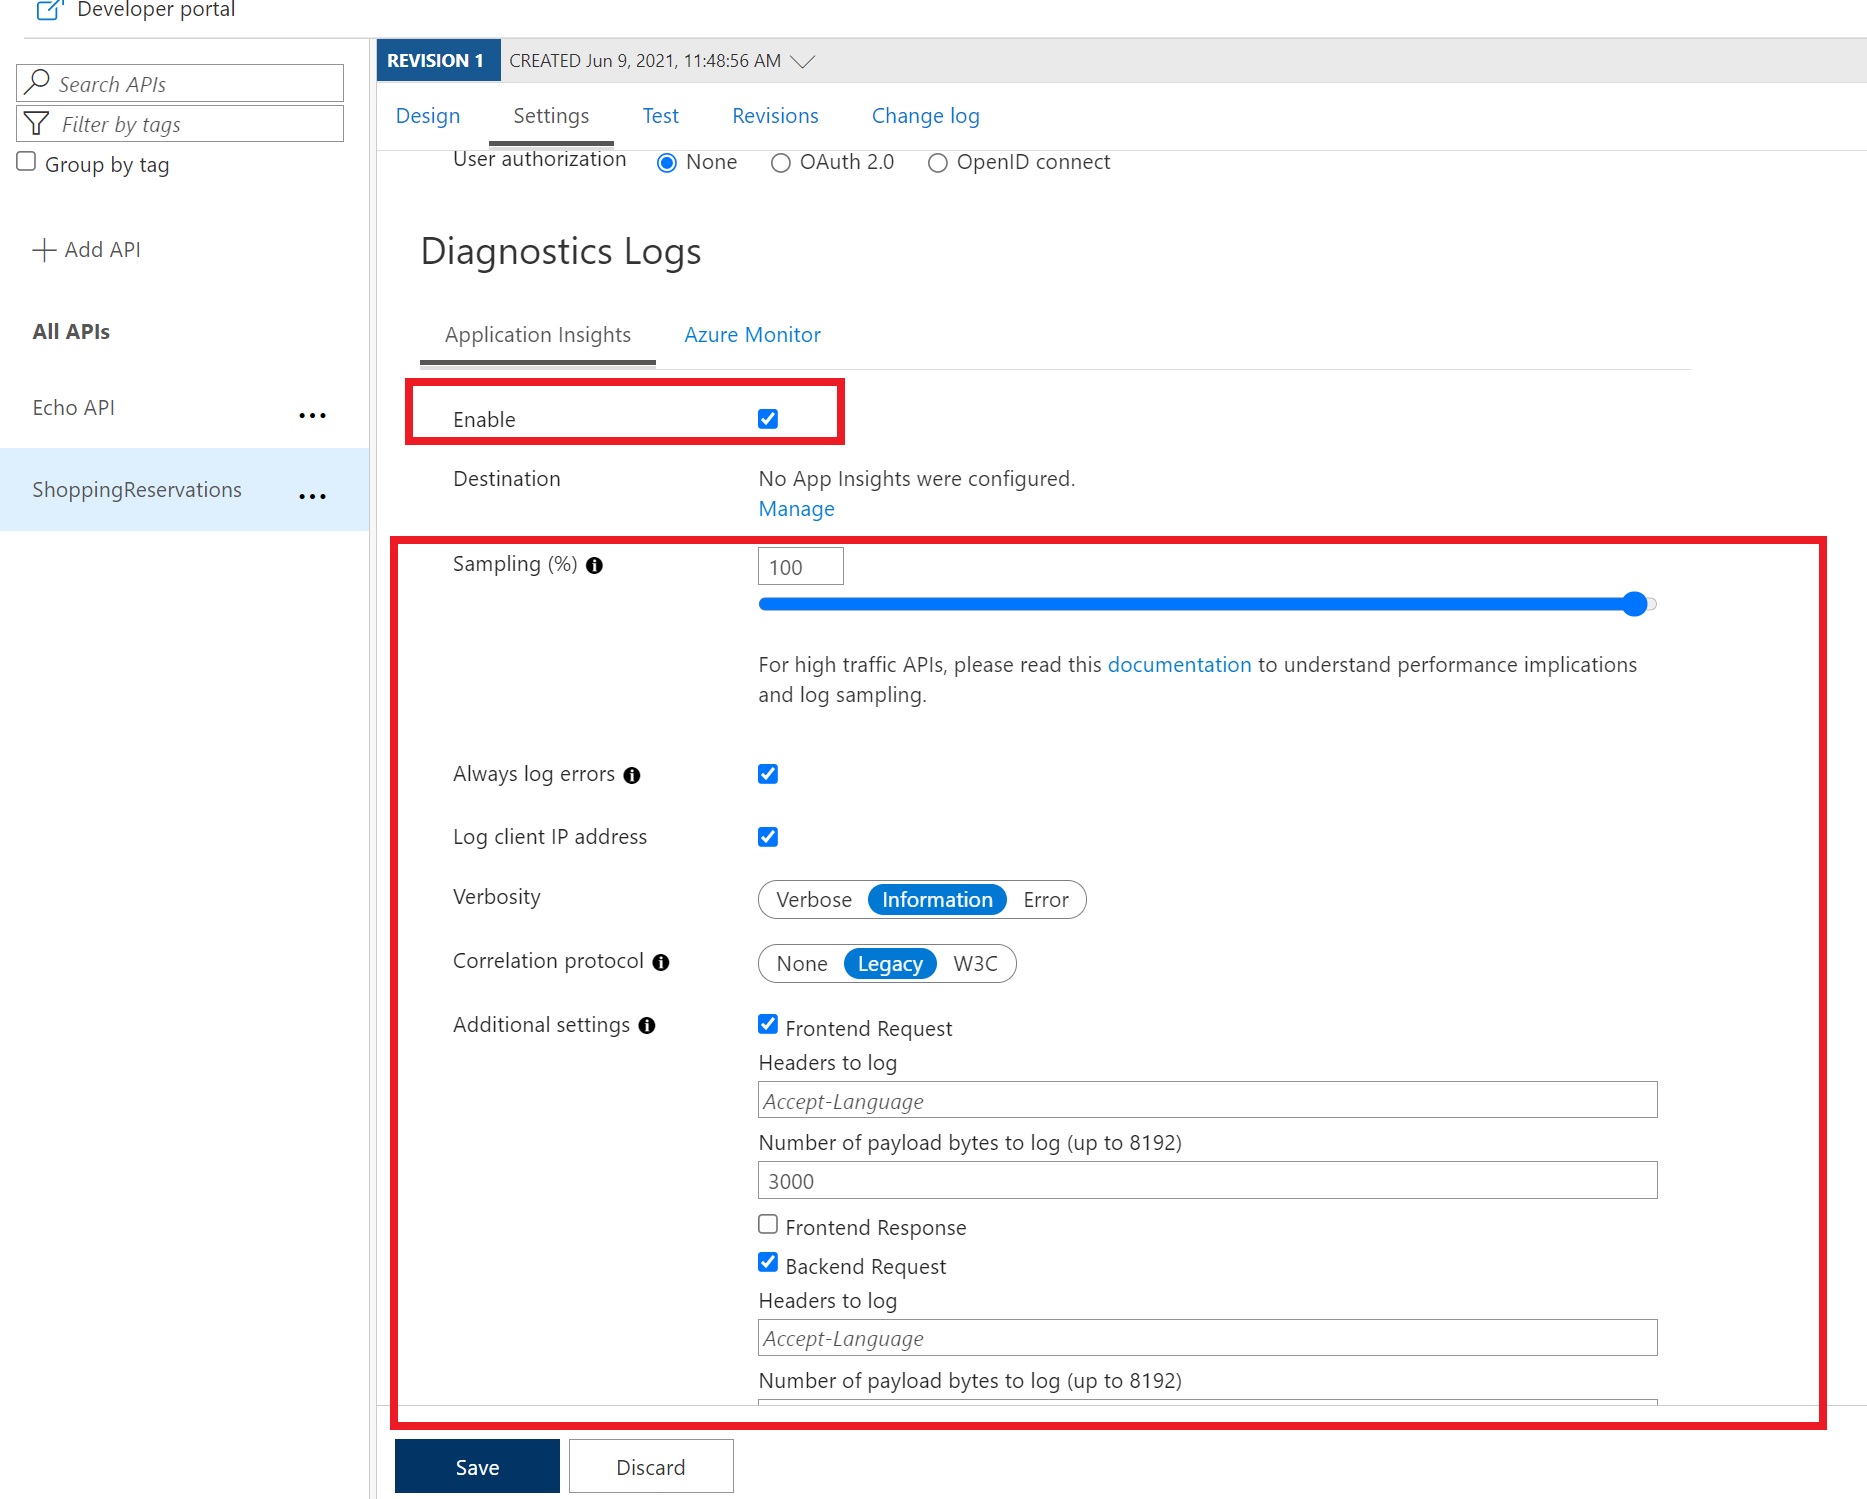
and you can also enable logging on Application Insights, by specifying also the sampling %, the type of logs and the verbosity (for example here I’m logging the Frontend and Backend requests):
When your API definition is completed, you can now export it:
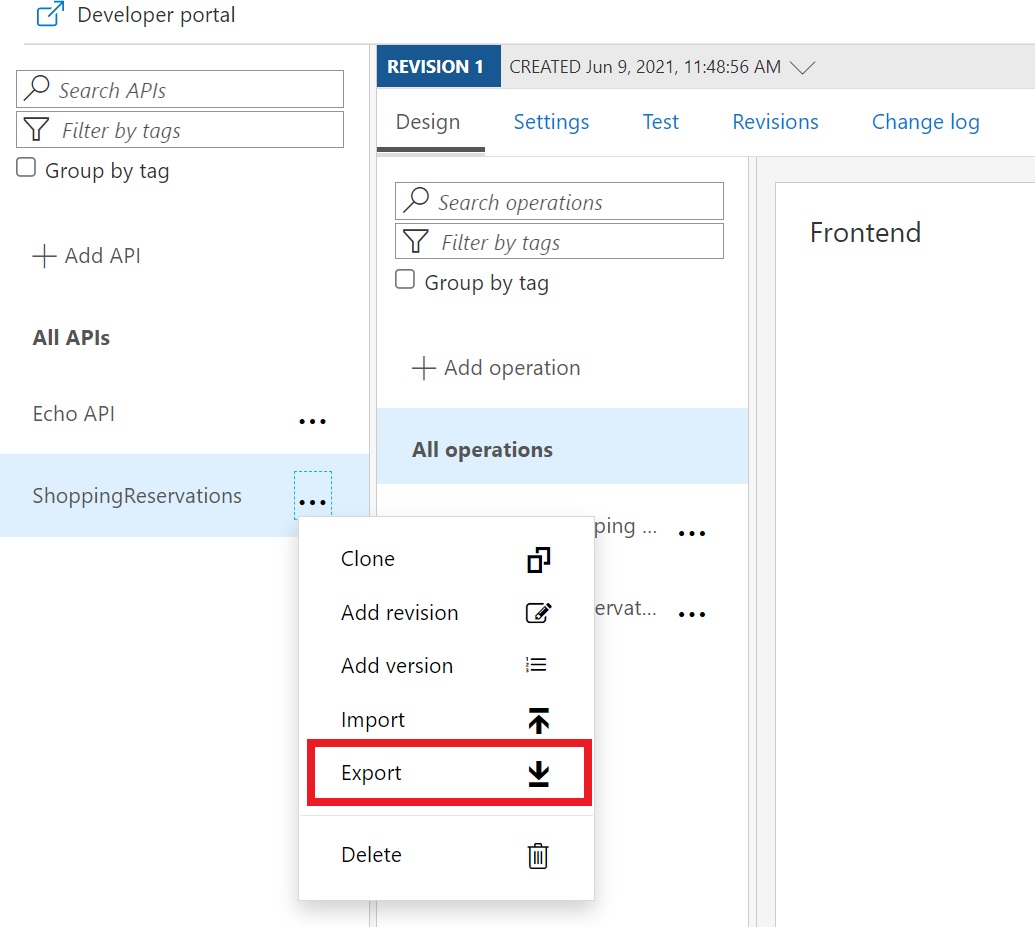
and when you select Export, you have the following options:

You can export your API definition in OpenAPI format, WADL or to Power Apps and Power Automate.
The nice thing of Azure API Management is also that you can publish a Developer Portal where your API definitions are exposed to authorized or anonymous users (it depends by you if the dev portal will be public or not) and your users can see the API documentations and export the definitions:

So… what is the most interesting part here, at least in my personal opinion? That you can expose your Business Central APIs with OpenAPI standard? No. That you can protect and better scale your Business Central APIs? Yes, but not only…
What I think it’s cool here is the Power Apps and Power Automate export. This permits you to easily export your API definitions to the Power Platform (Power Apps and Power Automate) as custom connectors for consumption by citizen developers. The Azure API Management connector is in the standard Power Platform license if you’re using Dataverse for Teams for example, and in this way you can avoid on using the standard Business Central connector for Power Platform that instead is listed as a Premium connector.
Should I always use Azure API Management for my real world projects? Maybe not, but I think that for enteprise projects or large integrations, it’s something that you should start considering.

Hi, great article.
Just One question, do I have to use API management in orden to use Business central web api with Power Automate? I think it is posible making an http request to business central, right? Or am I wrong?
LikeLike
Yes you’re absolutely right. You can use the built-in connector (Premium connector), you can send an HTTP request (but you need to handle the call) or you can use Azure API Management if you want an out of the box free custom connector. It’s up to you the choice.
LikeLike
What different happens when no frontend definition is created:?
LikeLike
Hi Stefano,
Now it has gone a while from yours Api Management post, have you find new use cases to use this tool? We have all the time more and more Power Platform projects, and I think how this tool could help our work. When customer has multiple BC countries and external PIM application which act like master data, could we found help on this tool?
LikeLike