

Starting from Dynamics 365 Business Central 2020 Wave 2 (v17) administrators can define retention policies for tables to specify how frequently they want Business Central to delete outdated data in tables that contain log entries and archived records (they are essentially a way to define when data on certain tables expires in your database).
Why you should use retention policies with Dynamics 365 Business Central? Essentially for the following reasons:
- reduce the size of your database
- reduce the impact on performances due to a large database
- delete logs and archives tables that are normally “always growing” tables and that can contain older data no longer relevant
- avoid a manual cleanup process
With Dynamics 365 Business Central you can define a retention policy for a table by going to the Retention Policies page. Here you can select a table from a list of pre-defined tables where you can apply a retention policy.
Remember that not all tables are included here. If you want to add tables from an extension to a retention policy, a developer must add the tables to the allowed list (and we’ll see how to this later).
In the next step you need to select a Retention Period (that specifies how often data will be deleted), you can select if the policy applies to all records in the table or only to the filtered records and in this last case you can specify filters:
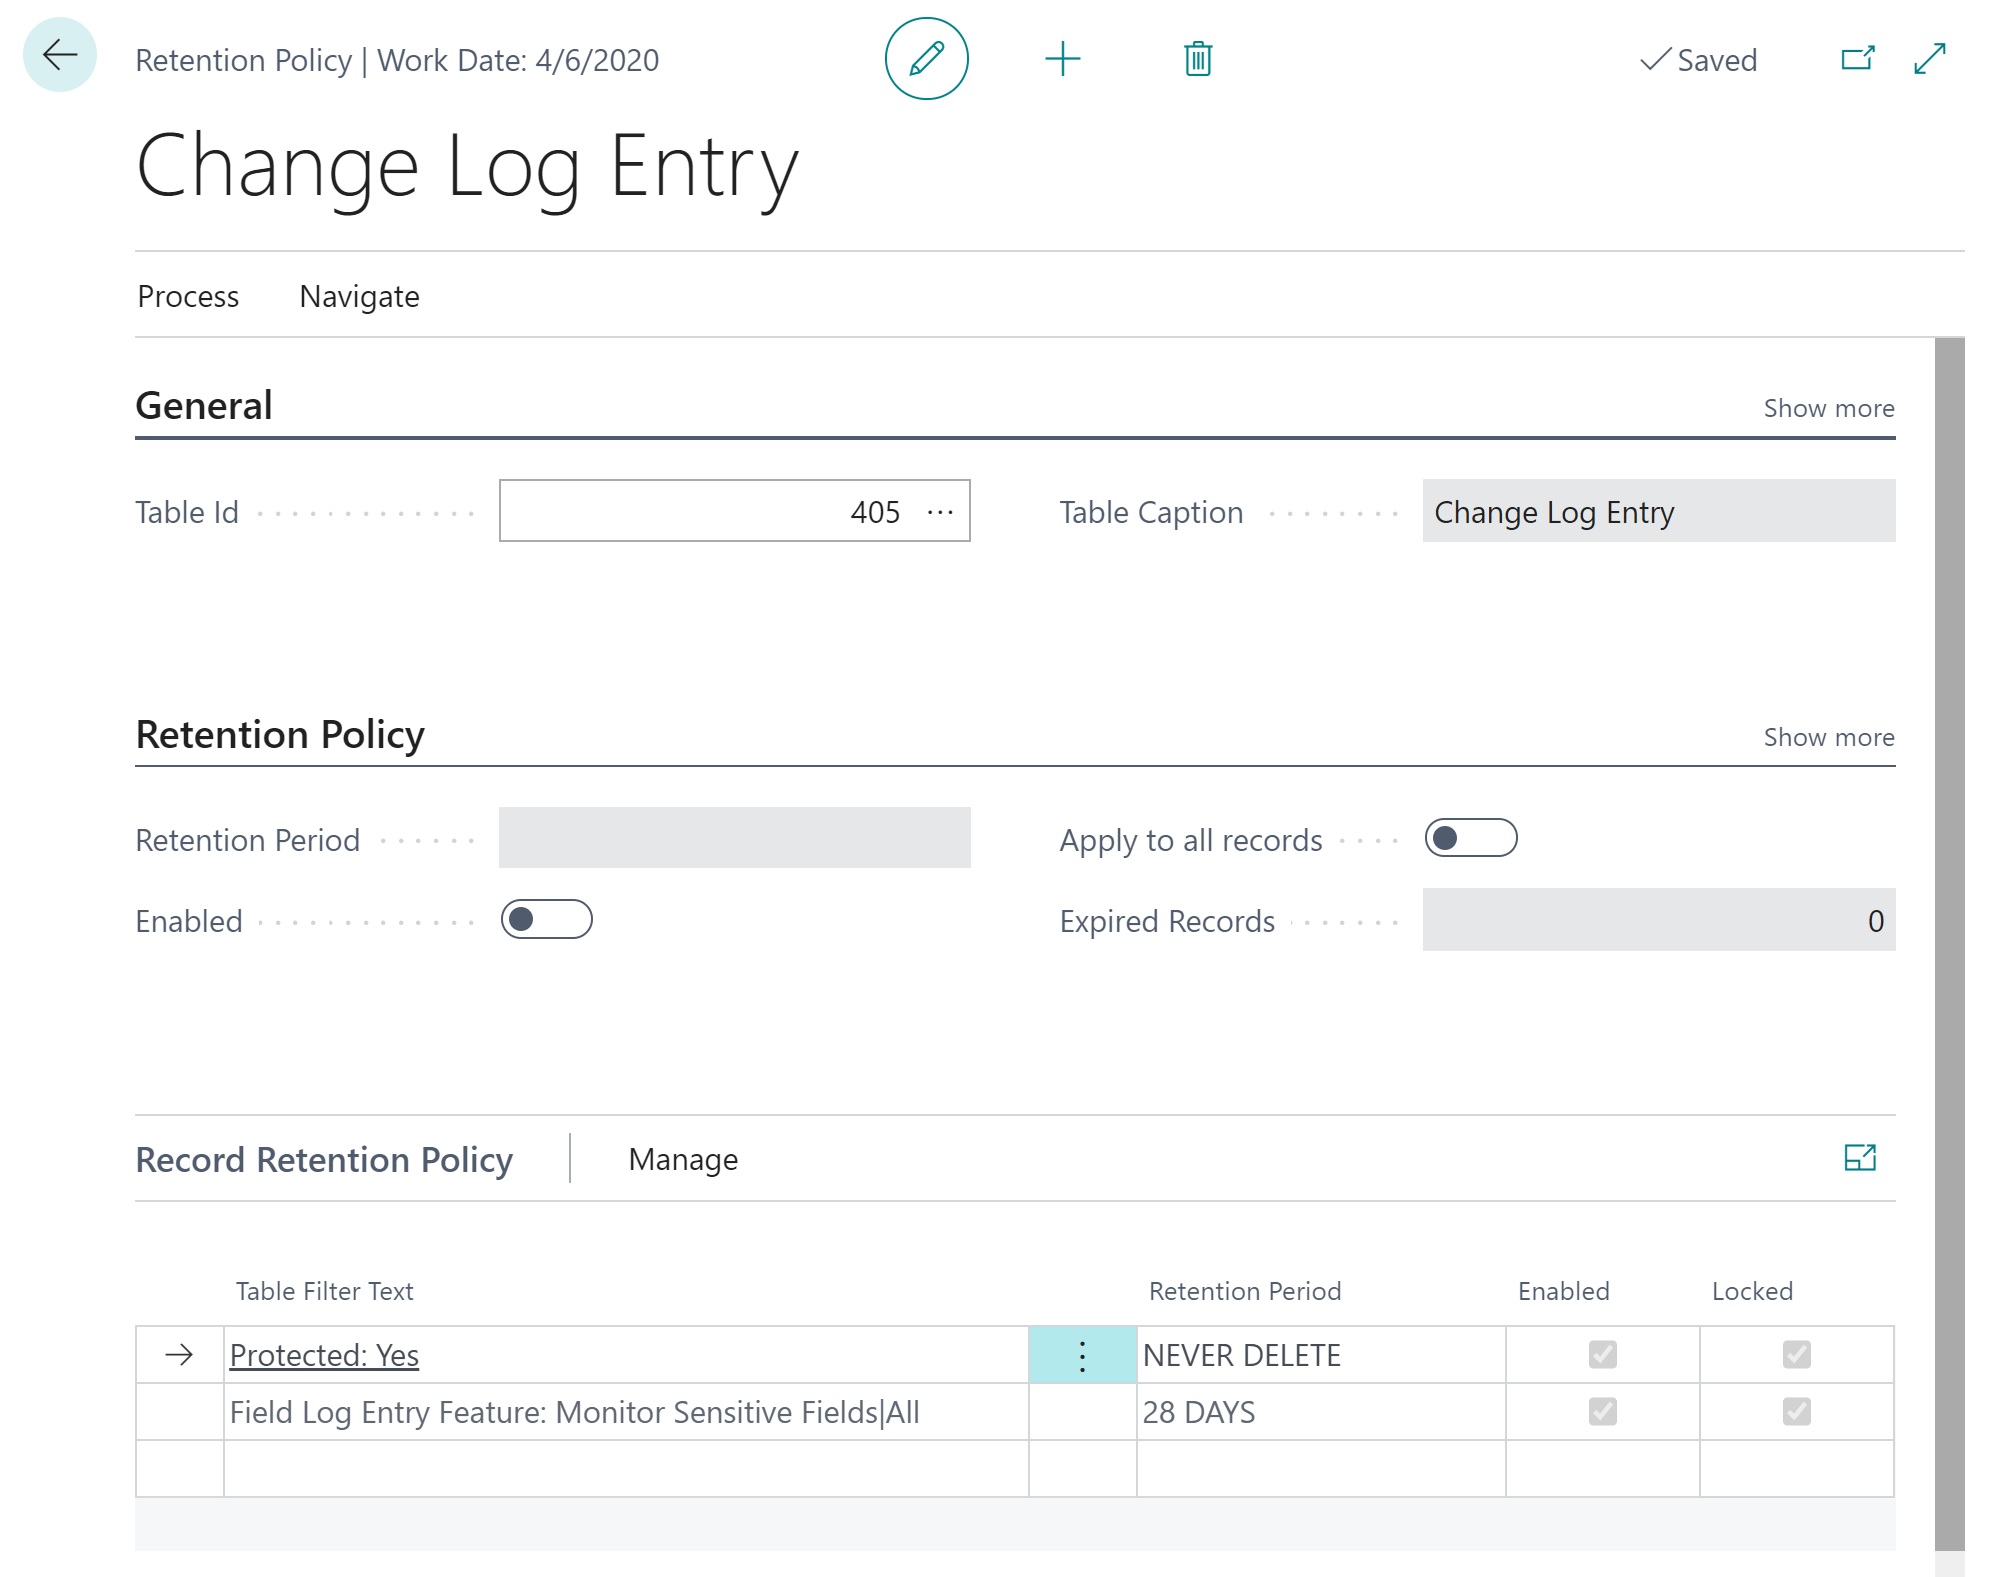
P.S. remember that you can do that only if you have the SUPER user permissions or the Retention Policy Setup permission set assigned.
Wten defined, To apply a retention policy to your data, you can:
- apply it manually (Process –> Apply Manually)
- use a job queue entry (when you enable a policy, a job queue entry is automatically created and it will apply retention policies according to the retention period you specify. All retention policies will use the same job queue entry).
But now the main goal: how you can programmatically insert a table in the list of allowed tables for retention policies?
This is a developer task and only the owner can add a table to the retention policy allowed table’s list.
To show how to do this, I’ve created a simple extension with a table that archives document details. Each document has an Archive Status field that can be Active or Archived. The table is defined as follows:

Then, in the extension I’ve created an Install codeunit that adds this table to the allowed tables for defining a retention policy. Here I want to set a policy with the following rules:
- The mandatory minimum retention days for records must be 7 days
- Records with the Active status cannot be deleted (mandatory)
- Records with the Archived status can be deleted, the default retention policy should be 1 month but this can be changed by the administrator.
The codeunit that defines the policy and adds the custom table to the retention policy allowed table’s list with the above rules is defined as follows:

Here I’ve defined the two policies (see comments) and these policies are applied to the table by using the AddTableFilterToJsonArray method of the “Reten. Pol. Allowed Tables” codeunit.
When the polocies are defined, the table is added to the allowed list by using the AddAllowedTable method (it has different overloads and here I’ve used the method with more parameters).
What happens now?
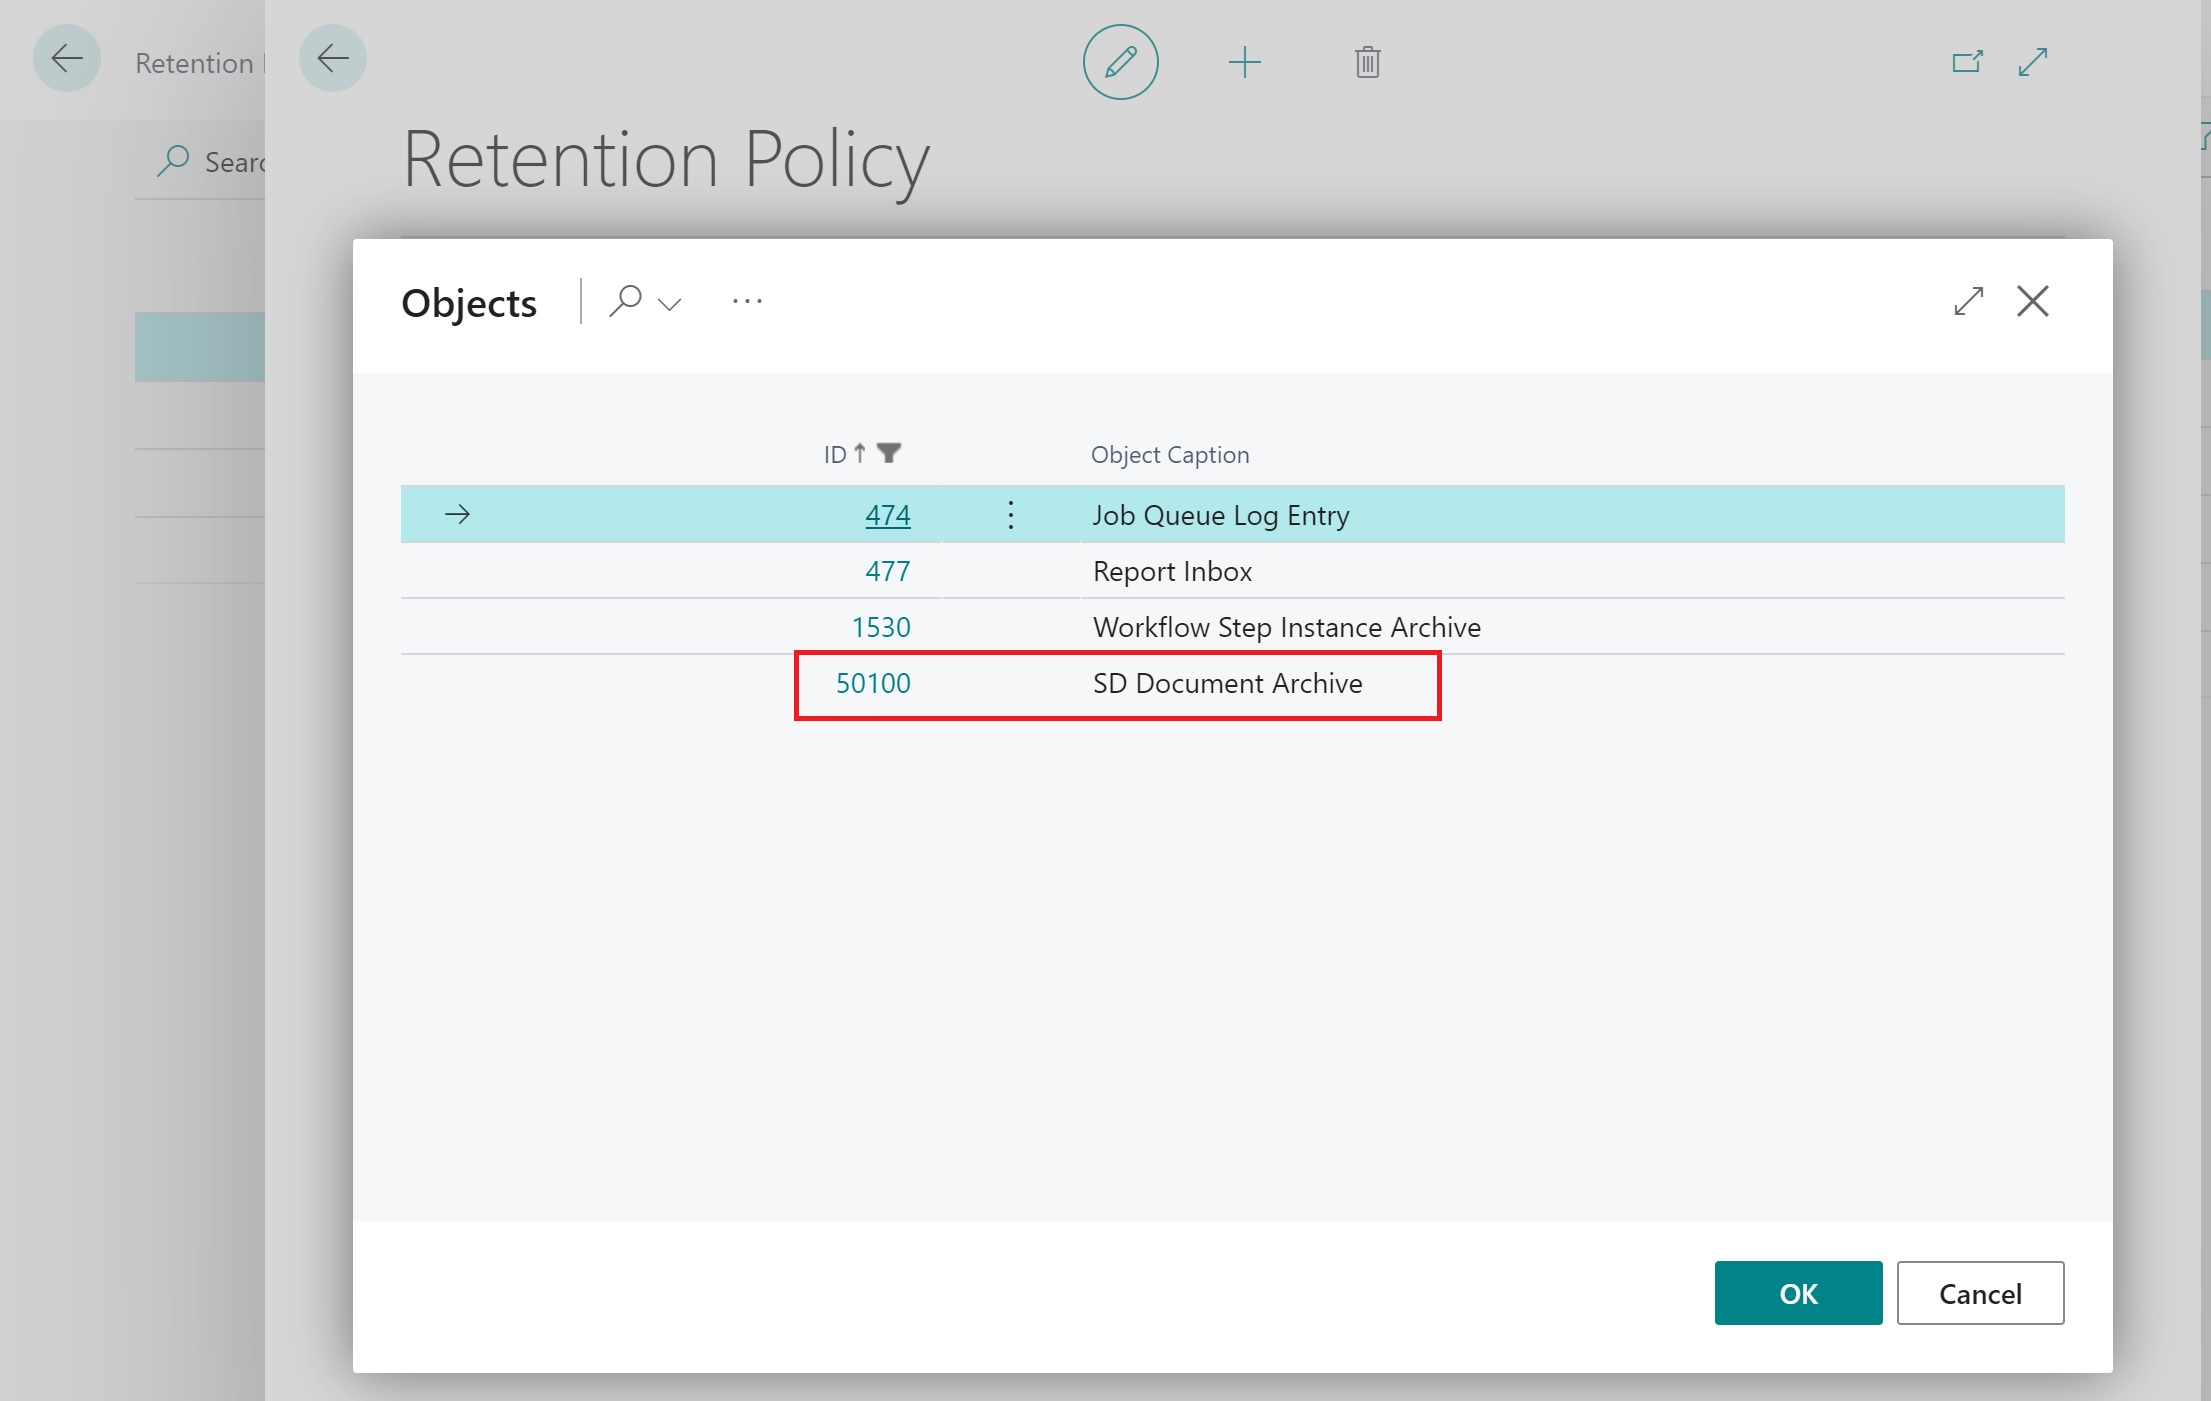
If you create a new retention policy, now in the allowed table’s list you have your custom table:
When you select your custom table, a policy with the predefined settings is created:
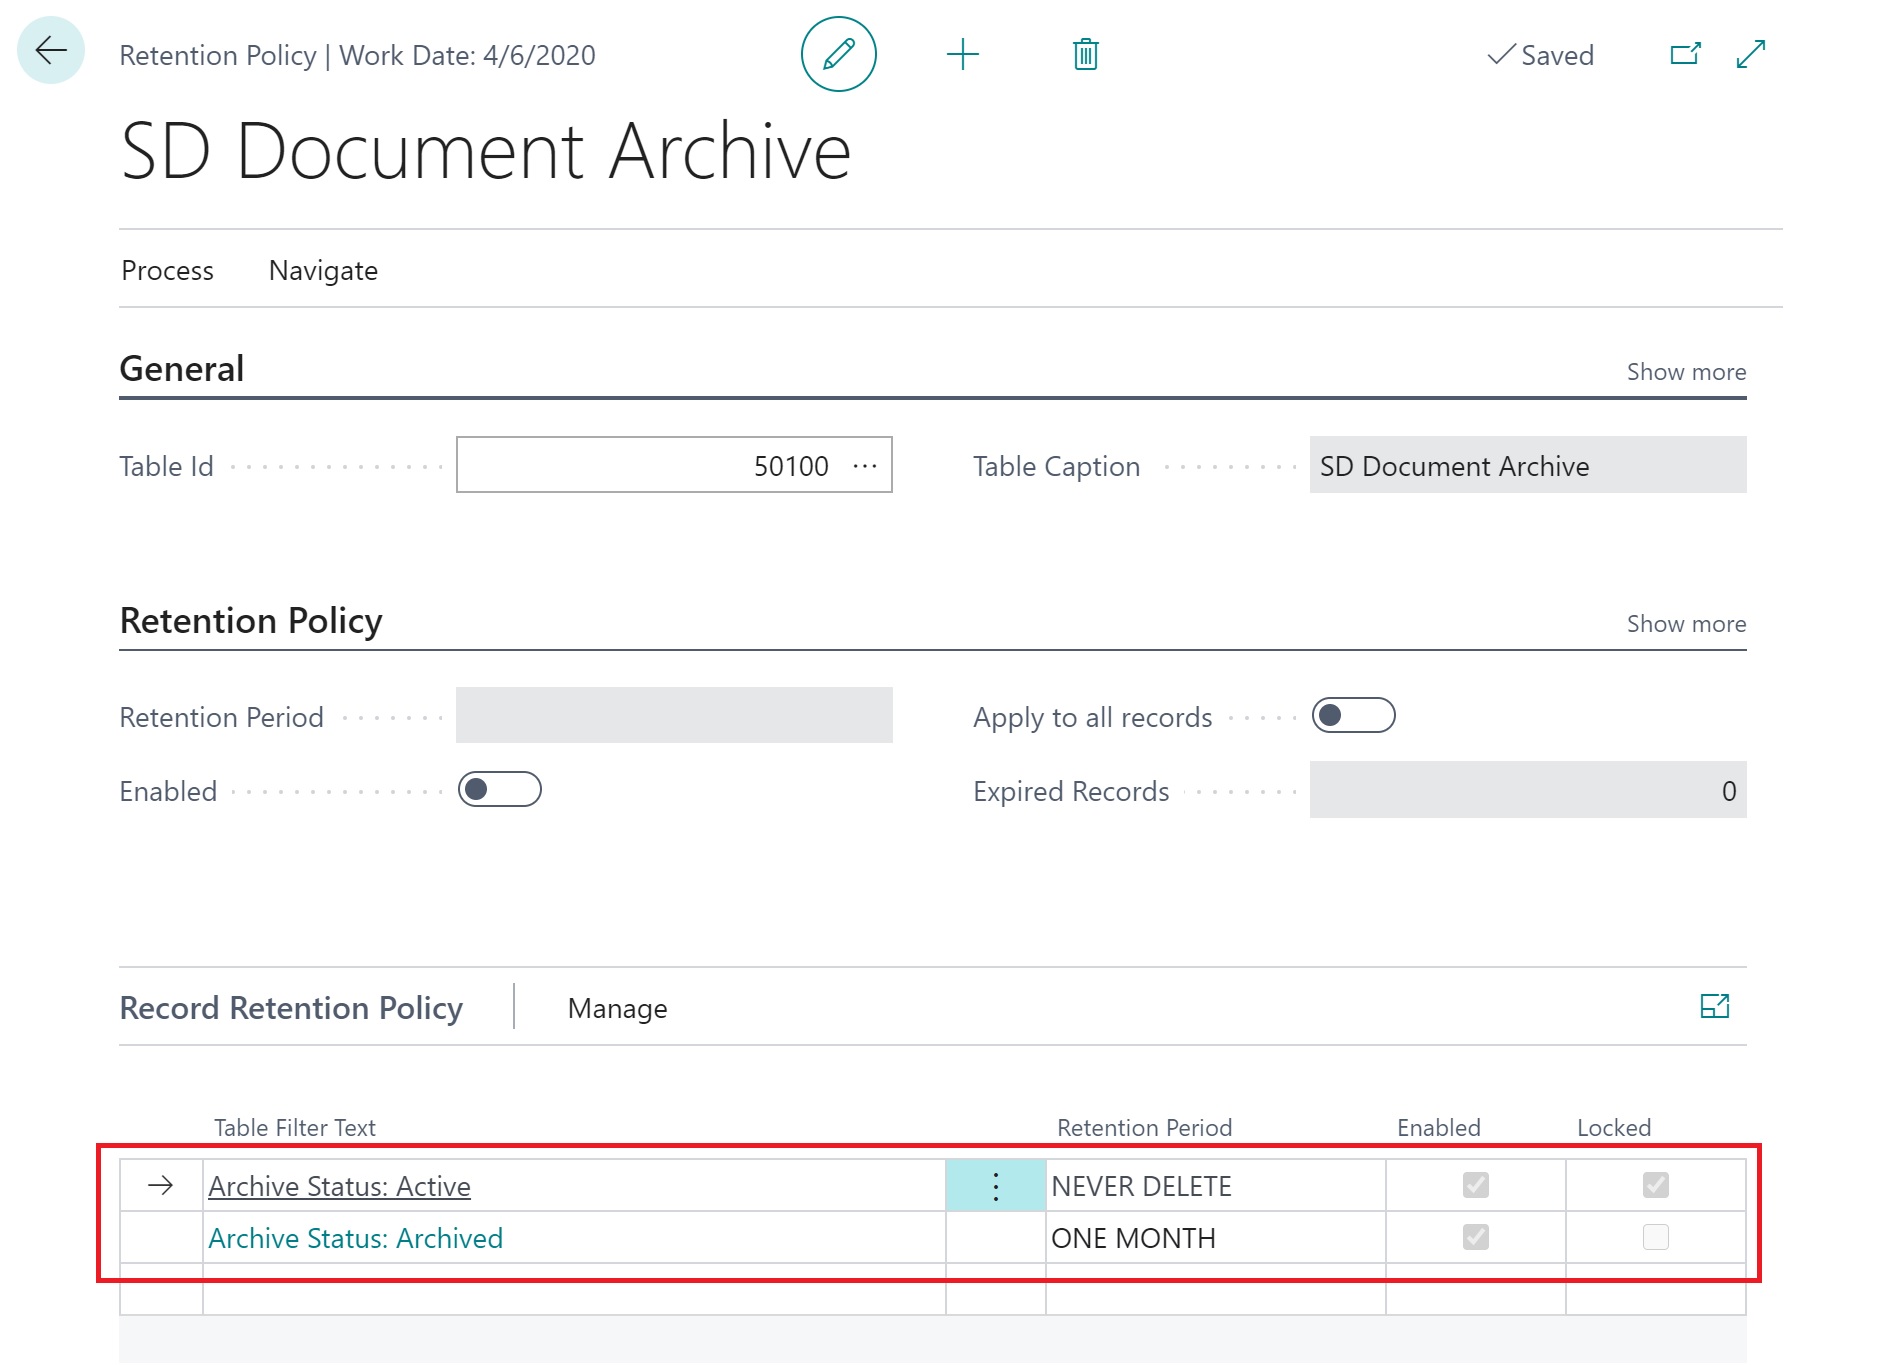
As you can see, the first filter (for active records) is locked and you cannot change it. The second filter (for archived records) is suggested but you can change it as per your business needs.
Now just enable the policy and you’re ready to go 🙂
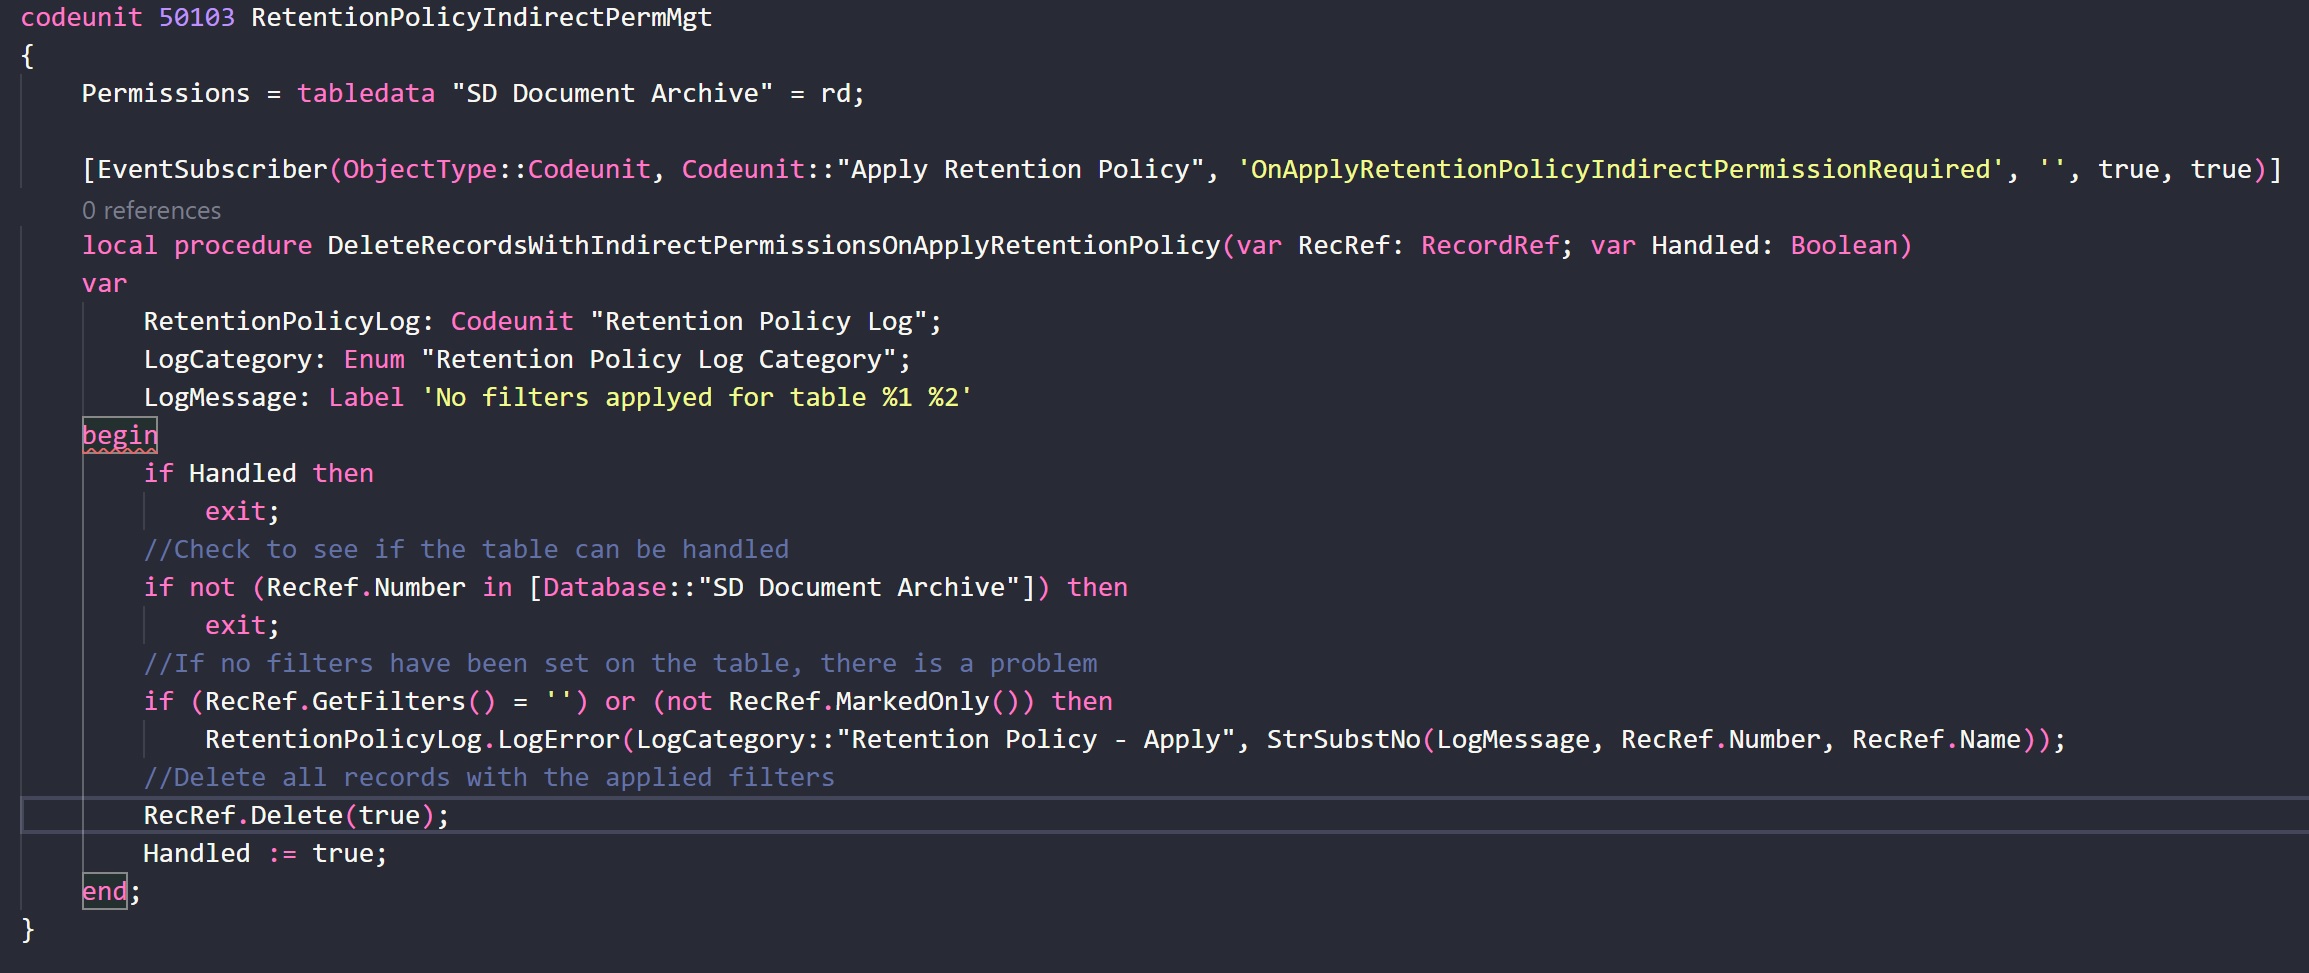
Last thing to consider: when you add your custom tables to the list of allowed tables for retention policy, you could have issues with indirect permissions if users executes a policy manually. For indirect delete permission, you can subscribe to the OnApplyRetentionPolicyIndirectPermissionRequired event as follows:
For more complex scenarios, just remember that you have also two interfaces available for defining custom policies:
- interface “Reten. Pol. Filtering”
- interface “Reten. Pol. Deleting”
Happy cleaning… 😉

Thanks for this, Stefano! These blog posts are always a good addition to default documentation!
LikeLiked by 2 people
Hello, have you tried the interface (“Reten. Pol. Deleting”)? I created one, but the Default interface is always used.
thanks for your blog 🙂
LikeLike