


In the webcast we had this Monday for Microsoft Western Europe about using Azure DevOps for managing Dynamics 365 Business Central projects, when talking about the best practice to set policies for your branches, there was an interesting question: can I create cross-repositories branch policies? Also programmatically? I’ve partially answered the question and this post aims to be a more complete answer.
In an Azure DevOps repository you can create different branches and for every branch you can set a branch policy. This is extremely recommended for protecting your branches and in my opinion it’s a must to do always.
To create a policy for a particular branch, select your branch and then go to the Branch policies menu:
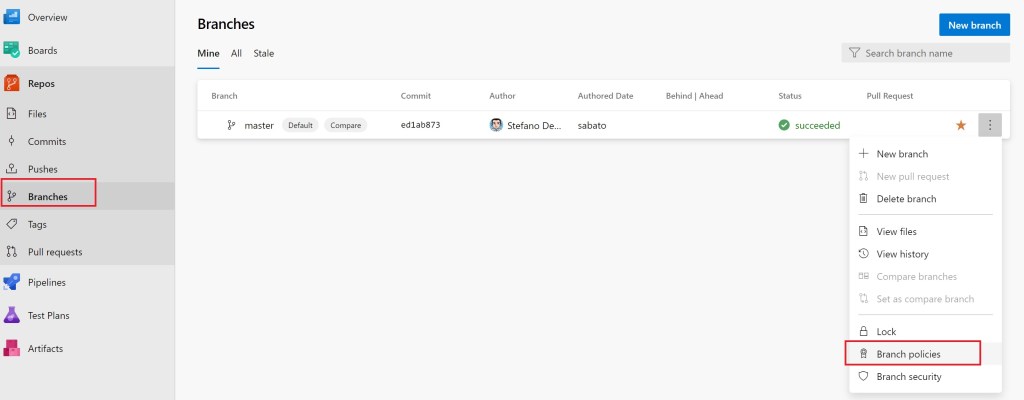
Here you can set different policies that will be applied to the branch, like reviewers, approvers, build policy and so on:

I’ve to admit that this is my preferred way of work 🙂
But what about creating a cross-repo policy, that will be automatically applied to all branches for your project?
You can do that by going to Project settings in Azure DevOps and then select Cross-repo policies (under Repos):

Here you can add a branch protection. You can select to protect the default branch of each repository or to protect current and future branches matching a specified pattern. For example, by inserting * I’m creating a policy for all the branches in my project:

By applying a name-based pattern you can for example create a branch protections for all master branches in the project, anotherpolicy for all develop branches in the project and another one for all release/* branches. Quite useful isn’t it?
But what about setting Azure DevOps policies programmatically? Here it was my missing response. I’ve suggested using the Azure DevOps APIs but after a bit of consulting with the Azure community now I know that there’s a more easy way: using the Azure CLI.
With the Azure CLI you can use the az repos policy command (and its options) to create branch policies. How to do that?
First, I’ve installed (or updated) the Azure CLI with this Powershell command:
Invoke-WebRequest -Uri https://aka.ms/installazurecliwindows -OutFile .\AzureCLI.msi; Start-Process msiexec.exe -Wait -ArgumentList '/I AzureCLI.msi /quiet'
Then I’ve added the azure-devops extension:
az extension add --name azure-devops
Then, I’ve select the organization and the project where I want to work (setted as default):
az devops configure --defaults organization=https://dev.azure.com/demiliani
az devops configure --defaults project=D365BCDevOps
Now I list the IDs and names of the repositories that I have in my project:
az repos list --query [].[name,id]
As you can see, I have two repos here:

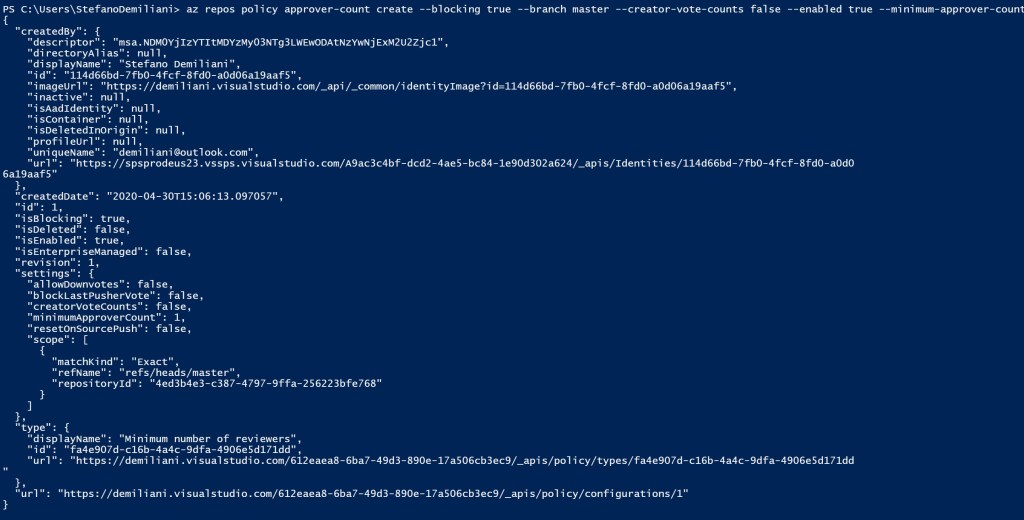
Then, for each repos ID I set the policy by using the az repos policy command. For the various option to set, please refer to this link. As an example, here I’m creating a policy for requiring a minimum of 1 approver in the master branch of each repo:
az repos policy approver-count create --blocking true --branch master --creator-vote-counts false --enabled true --minimum-approver-count 1 --reset-on-source-push false --allow-downvotes false --repository-id 4ed3b4e3-c387-4797-9ffa-256223bfe768
The policy is created:
In this way you can programmatically create policies for each repo in your organization very quickly. New thing learned 😉

You just saved my day! Had started working with the API’s and it didn’t look half as simple as the CLI. Personally I’m going to use to for adding build tags directly from the pipeline. The only thing you didn’t mention was how to authenticate, but I guess you didn’t mention it because it’s so easy with the devops agent’s pat and the az devops login command. Everything needed is described in your links, so thanks. 🙂
LikeLiked by 1 person