

We manage all our internal projects with Azure DevOps (projects not only related to Dynamics 365 Business Central). All our code is hosted on Azure DevOps but personally I’m using also GitHub for “external” projects or for sharing codes with the community (yes, Azure DevOps has public repository too but I prefer a separation on many cases). Unfortunately, build pipelines was a big lack for the GitHub platform… until today.
Yesterday GitHub has officially released GitHub Actions, an interesting set of features that permits you to implement CI/CD pipelines right from the GitHub interface.
There’s not too much documentation about the service and all its possibilities at the moment but it seems really interesting if you’re using GitHub as your main platform for hosting your code. I’ve tested the new service by trying to setup a CI/CD workflow on a repository where I have committed a .NET application (a class library we use on NAV and Dynamics 365 Business Central).
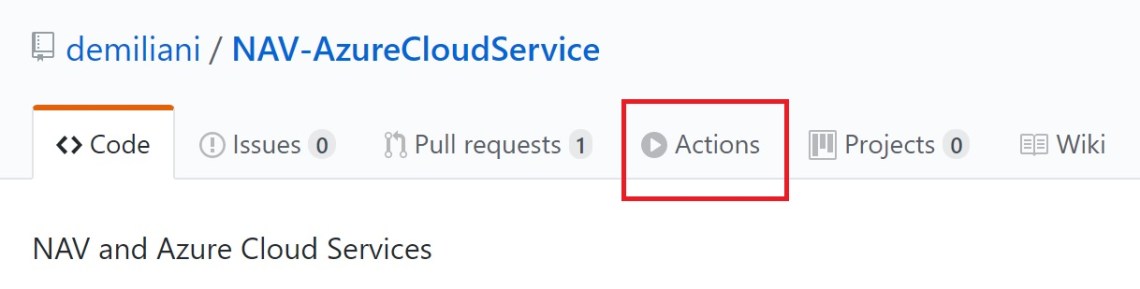
To start using GitHub Actions, go to your repository and select the Actions menu:
Here you can find a set of preconfigured templates to use, but unfortunately there’s not a template for .NET applications (only .NET Core at the moment, I was quite surprised for this). If you have a .NET application, you need to manually create a new workflow by selecting the Set up a workflow yourself button:

Here, you have a window where you need to write your build flow. This is the standard template:
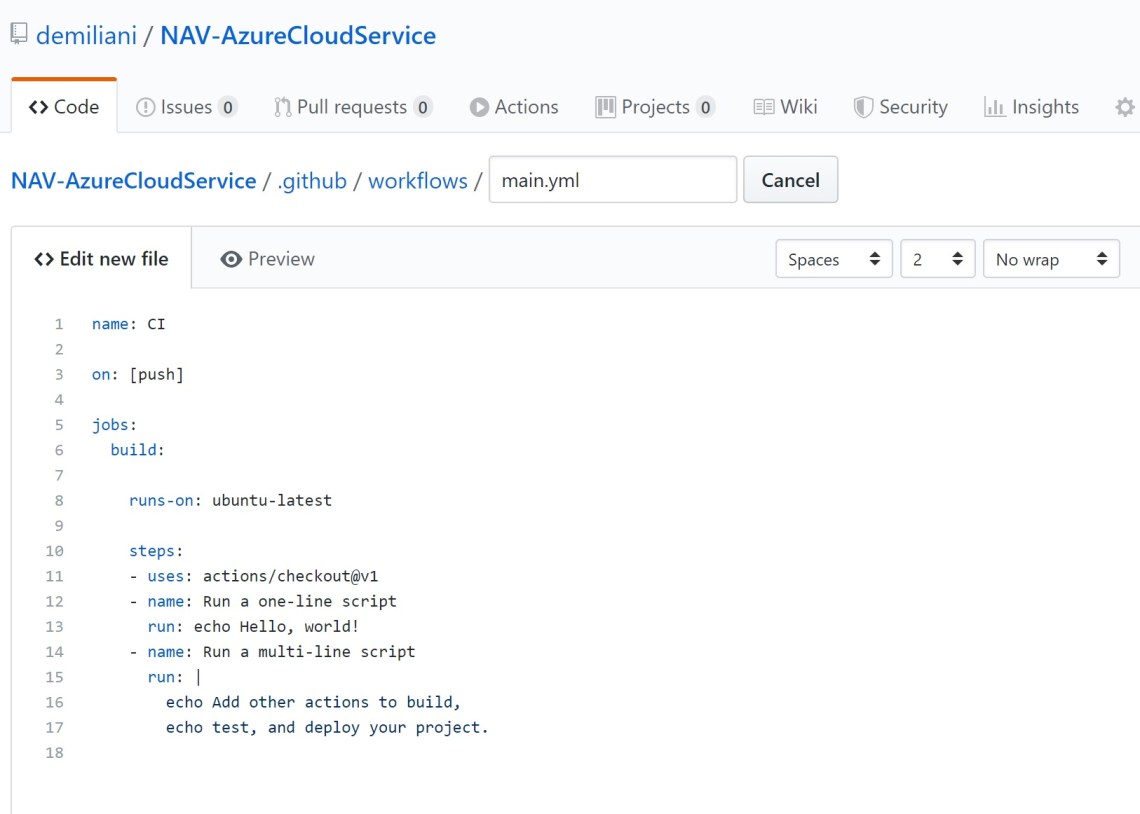
As you can see, the standard CI/CD pipeline runs on Linux (Ubuntu) and does nothing more than printing some messages.
Here, we have a .NET application and we new to run our action on Windows by using MSBuild. We need to modify the CI/CD pipeline script as follows:
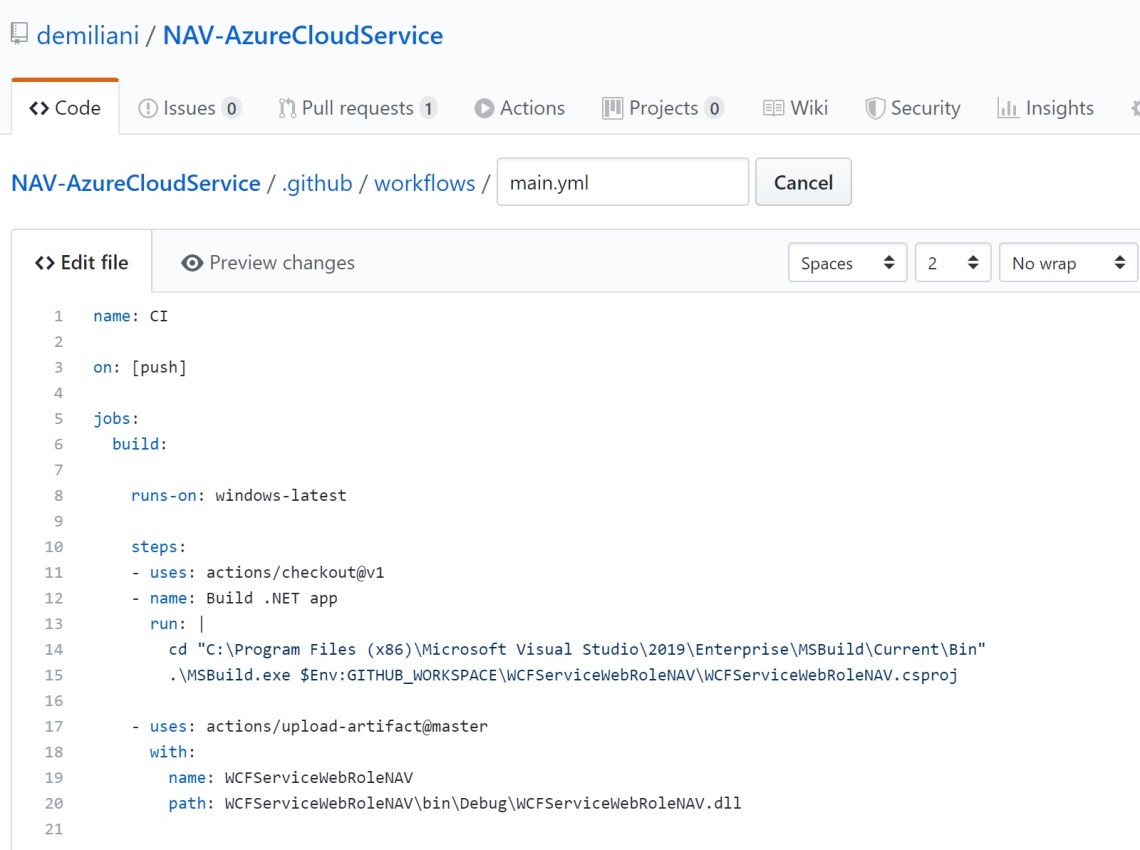
Here:
- the image is windows-latest (Windows Server)
- the actions/checkout@v1 step is a multiline command then pulls our repository to the build server (first line) and then starts MSBuild by compiling our project (thanks to the GitHub support for these details).
- the second step (actions/upload-artifact@master) is used to upload the final artifact (our DLL file) from the build server to GitHub (without this step, you will not be able to download the final artifact of your build).
If you commit this main.yml file a build trigger is automatically started and you can see the final result by clicking on Actions again:
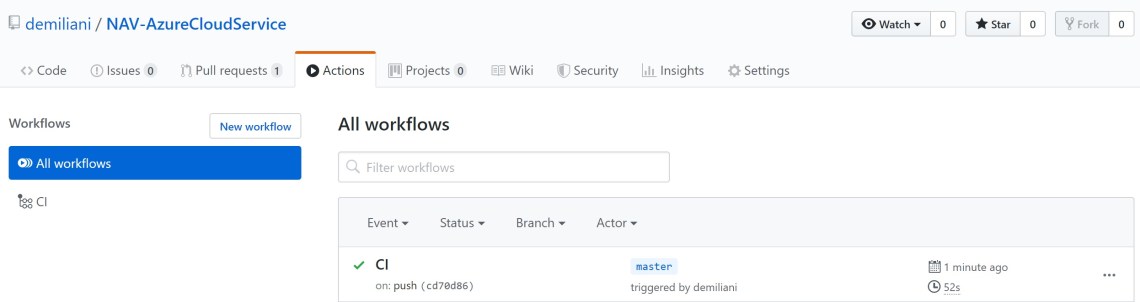
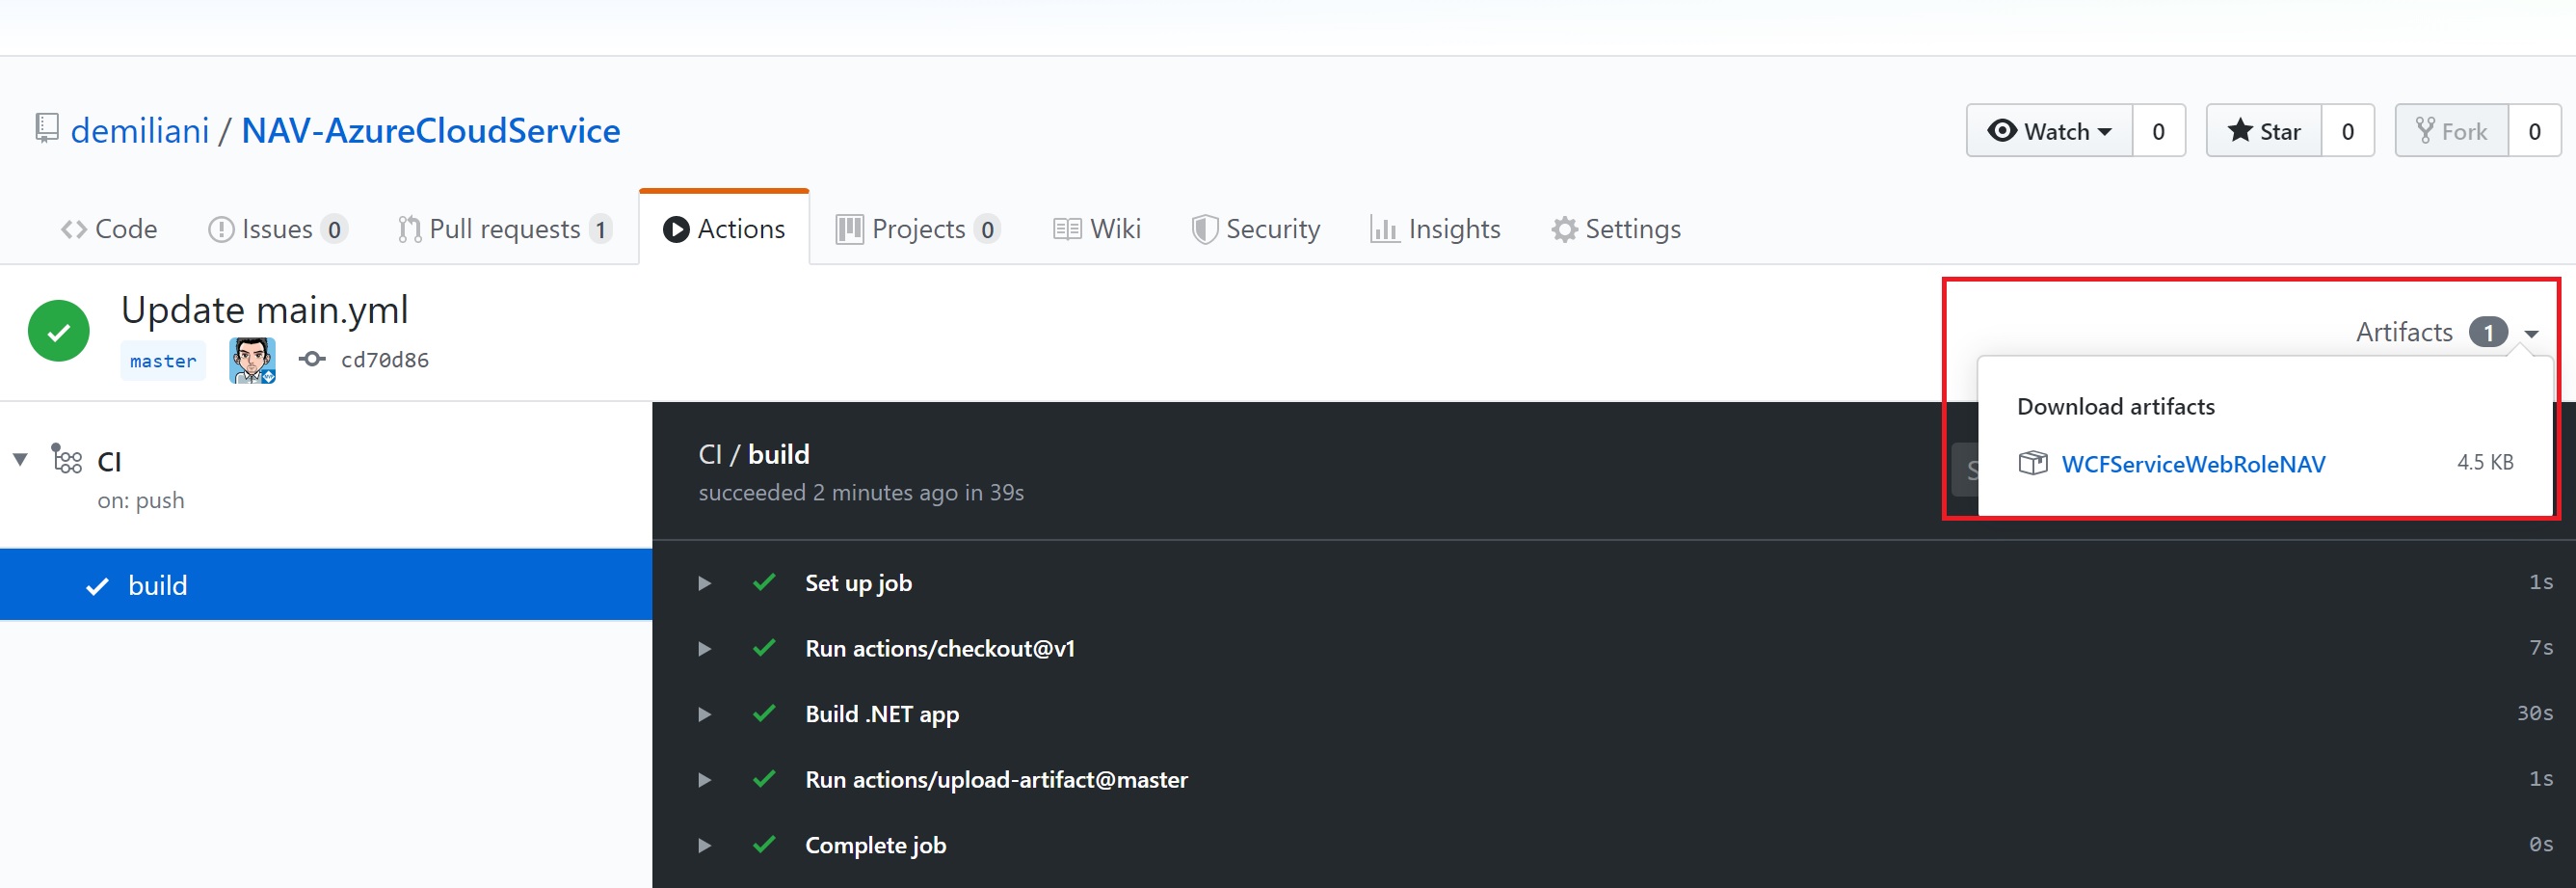
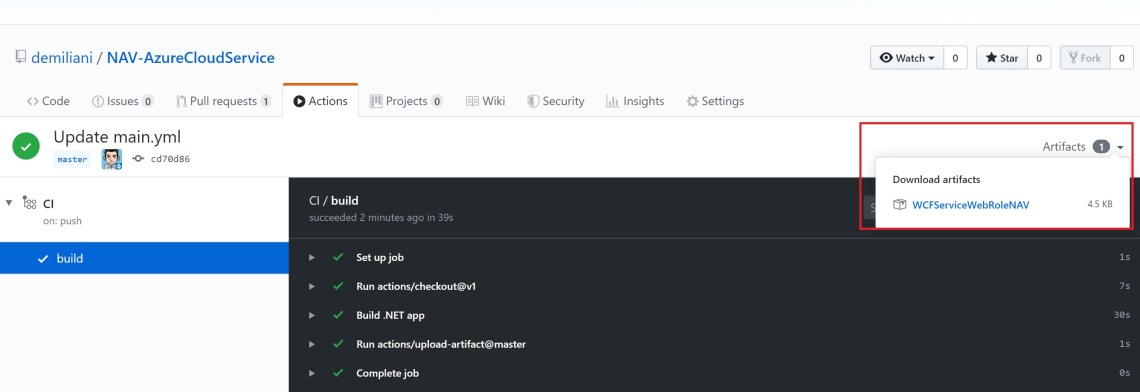
If you click on the CI event, you can see the details of the pipeline steps (success, failure and the reasons of the failure):

If the pipeline is completed successfully, on the top right corner you can download the final build artifact (Artifacts menu):
The workflow (your pipeline .yml file) is automatically saved in your repository and it’s part of your source control:

This is only a sample on how to easily create a CI/CD pipeline on GitHub for a .NET application in few easy steps. I think it’s cool and powerful.
I’ve not tested with Powershell yet, but from a GitHub Action you can execute Powershell scripts too. I’m not so sure if GitHub Actions can be used also for Dynamics 365 Business Central projects (this must be explored) but it sounds promising for many other scenarios.
