

In a previous post I described how you can start building extensions for the upcoming Dynamics 365 Business Central Wave 2 release on top of the Microsoft’s System Application.
Today I want to show you how you can directly customize the Microsoft’s Base Application (alias, the standard Microsoft codebase). This is a top request I receive every day on all the partners I met, but before starting this post, I want to put in evidence what I think (receiving this question so often is not a good sign): please avoid to do this as much as possible. From the Wave 2 release, Microsoft will permit you to modify the Base Application if needed but you should do this only if you cannot solve problems with the standard extension’s model. Please always remember that in this way you’re working like in the past.
Said that (very important to remember!) let’s start 🙂
Starting from a development environment based on a Docker container with the Wave 2 release, the first step to do is to extract the Microsoft’s source code in a local folder. You can do that with the following Powershell command:
$alProjectFolder = "C:\SD\BaseApp"
Create-AlProjectFolderFromBcContainer -containerName $containerName `
-alProjectFolder $alProjectFolder `
-useBaseLine -useBaseAppProperties -addGIT
This command extracts all the Microsoft’s source code (.AL files) in the specified folder and creates a Visual Studio Code project ready to go, with launch.json configured for your enviroment.
When you start this command, there’s an important option to consider: you can create a totally new Base Application (custom appID and Publisher) or you can use the Microsoft’s standard Base Application appID and Publisher. I prefer this second option (because it permits you to handle dependencies from the Base Application in the default standard installed apps like Intelligent Cloud Base, Sales and Inventory Forecast, Paypal etc. in a transparent way) so I’ve specified the -useBaseAppProperties setting.
Now start this comand:
and your AL folder file will be ready to go (you can also have files organized automatically by using the -alFileStructure option).
In this folder you have all Microsoft’s standard objects (.AL files), a launch.json file and an app.json file for your extension. As you can see, the app.json file is configured with the same parameters as the standard Microsoft’s Base Application and it has a dependency from the System Application:

Please also note that Target is set to onPrem (you cannot do that on a SaaS environment).
You now need to download dependencies (as usual) in order to have symbols recognized. You will see a lot of warnings too in your project (future deprecated things):

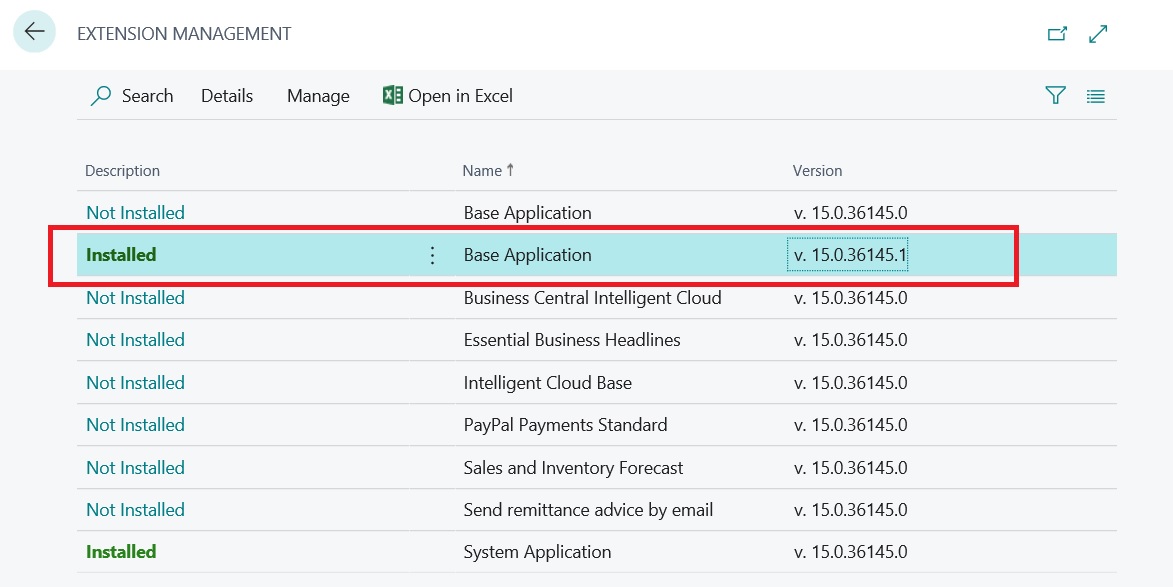
What we want to do now is a (stupid for simplicity) modification to the Microsoft’s Base Application, so as a first step I change the version number from 15.0.36145.0 (Microsoft’s standard number) to 15.0.36145.1 (new minor version). Then we implement our modification directly on the standard Microsoft’s objects. Here I directly modify the Customer table in order to add a new field called SD:

and then I directly modify the Customer List page in order to add that field to the page:

P.S. This is just a simple example, there are tableextension and pageextension objects for this 🙂 Imagine to do more complex customizations like modifying standard codeunits etc.
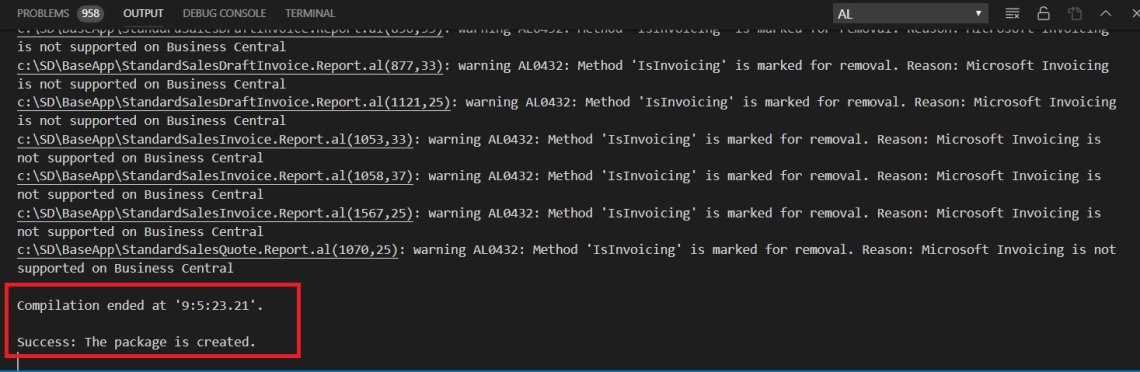
Now our code modification is complete and we can compile the app with Visual Studio Code. If all is ok you will have a file called Microsoft_Base Application_15.0.36145.1.app in your folder:
Now we have to publish our customized Base Application. For doing that, we can uninstall the existing Microsoft’s Base Application and all its dependent extensions:

If now you try to publish your custom Base Application from Visual Studio Code, you will receive an error like the following:

“The extension could not be deployed because it’s already deployed on another tenant”.
Why this? Because Microsoft’s Base Application is deployed with a Global scope and you cannot publish an app with the Global scope. To publish your custom Base Application, you need to use the Tenant scope, so start the following command:
Publish-NavContainerApp -appFile "C:\SD\BaseApp\Microsoft_Base Application_15.0.36145.1.app" -containerName $containerName -install -scope Tenant -skipVerification -saveData
and then
Sync-NavContainerApp -appName "Base Application" -appVersion 15.0.36545.1 -containerName $containerName
Maybe you should also use the following command after the app installation (for preserving data):
Start-NavContainerAppDataUpgrade -appName "Base Application" -appVersion 15.0.36145.1 -containerName $containerName
At the end of this process, you have your customized Base Application installed:

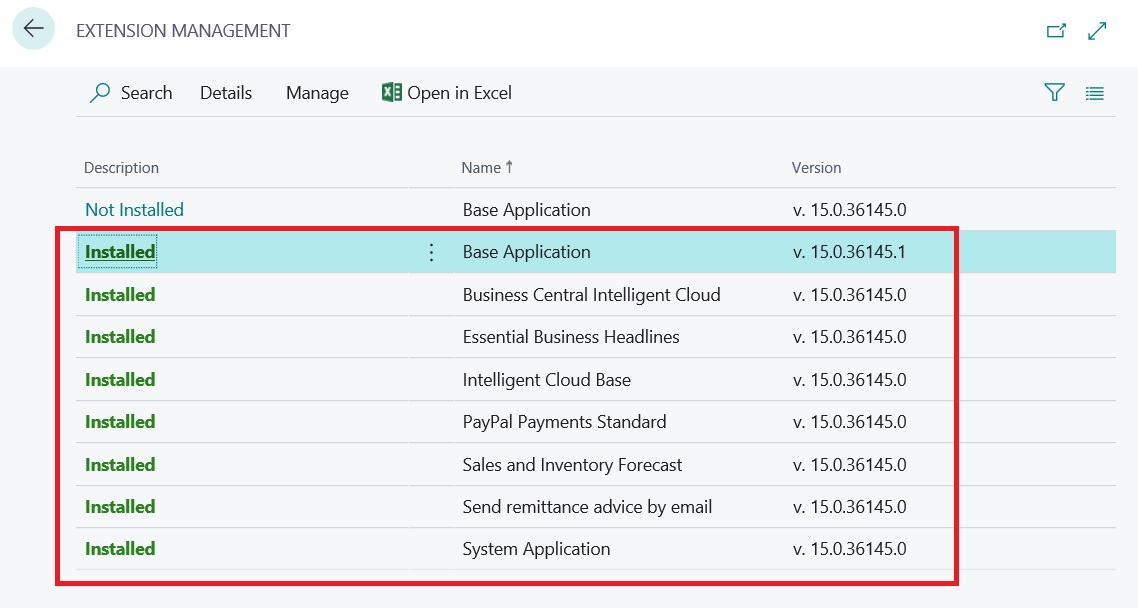
You need to also republish the standard Microsoft’s dependent extensions if you want to have all the previous functionalities available again:
Now you’re ready to go! In our example, if we open the Customer List page, we can see our new SD field (added with the direct modification inside the Base Application):

As you can see in this post:
- With Dynamics 365 Business Central Wave 2 release, you can modify the Base Application again by directly altering the Microsoft’s standard objects
- This code base modification works only for on-premise scenarios
- If you take this direction, you’re creating a brand new app and you’re not compliant with future releases. In the future, you will have to merge your code again.
I repeat myself again: please avoid this as much as possible. This is not the best practice to do and in this way your extension is not ready for the cloud. Remember always that “in the future, on-premise will follow cloud rules“.

Hi, thanks for the post. Question (maybe stupid one): what do you mean by “compile the app with Visual Studio Code”, how can this be done?
LikeLike
As you can see in the post, you have a Visual Studio Code AL project with all the Microsoft’s source code in .al files like every other extension you create from scratch. To have a .app file to publish on D365BC you need to compile (CTRL+SHIFT+B) your project in VS Code as usual.
LikeLike
Ok, did this exercise. But it is very very slow.. It took more than 10 minutes to compile version ‘15.0.36545.1’ and another 10-1 minutes to publish extension.. Feel like 20 years ago when you were starting compile code in the evening and by next day in the morning it was ready :)) Don’t know how Microsoft thinks this Business Central AL can be usable in the real life as it is at this moment..
LikeLike
Hi Stefano Demiliani, thank you for the post, it’s very interesting!!! I Have a question, it is possible to do all this with out Docker container?… unzipped the “Base Application.Source.zip” located in Business Central folder Installer, then open this folder un VSCode but i have 13629 problems. Compiled the project but give me “Error: The package could not be created.” Thanks for everithing.
LikeLike
Yes absolutely possible. Have you downloaded symbols? The app.json file has the correct dependencies?
LikeLike
Hi Stefano, after unzipped “Base Application.Source.zip” and downloaded symbols I’ve many error. For example in AutomationExtensionUpload.Page.al file this row was in error:
DotNetALPackageDeploymentSchedule: DotNet ALPackageDeploymentSchedule;
“DotNet ‘ALPackageDeploymentSchedule’ is missing.
Where is the problem?
LikeLike
In VS CODE try to set the following option in user settings or workspace settings:
“al.assemblyProbingPaths”: [
“C:\\Program Files\\Microsoft Dynamics 365 Business Central\\150”,
“C:\\Program Files (x86)\\Microsoft Dynamics 365 Business Central\\150”,
“C:\\Program Files (x86)\\Reference Assemblies\\Microsoft\\Framework\\.NETFramework\\v4.7.2”,
“C:\\Program Files (x86)\\Reference Assemblies\\Microsoft\\WindowsPowerShell”
],
LikeLike
Hi Stefano, thanks for the quick reply. But now in the compilation I have numerous warnings concerning syntax or objects that in the future will be errors and four error in one file that prevent the compilation.
File is ExchangePowerShellRunner.Codeunit.al
This is errors:
DotNet ‘PSCredential’ is missing
DotNet ‘ErrorRecord’ is missing
‘DotNet’ does not contain a definition for ‘GetEnumerator’
How I can solve also these too?
Thanks in advance
LikeLike
Do you have C:\Windows\assembly path added to assemblyProbingPath?
LikeLike
Yes. And all other error are gone. Only these remained
LikeLike
Excuse me, Stefano, I didn’t check well. That reference was missing and I entered it.
Now there are only two error:
in file AzureMLConnector.Codeunit.al this row:
AzureMLRequest.SetHttpMessageHandler(HttpMessageHandler);
Errorr:
Argument 1: cannot convert from ‘DotNet “System.Net.Http.HttpMessageHandler”‘ to ‘DotNet “System.Net.Http.HttpMessageHandler”‘
Missing other reference?
LikeLike
.NET Framework 4.7.2 is installed on your machine?
When solved, could be error if you will post here the references you’ve added to VS Code.
LikeLike
This is reference added in my settings.json:
“al.assemblyProbingPaths”: [
“C:\\Program Files\\Microsoft Dynamics 365 Business Central\\150”,
“C:\\Program Files (x86)\\Microsoft Dynamics 365 Business Central\\150”,
“C:\\Program Files (x86)\\Reference Assemblies\\Microsoft\\Framework\\.NETFramework\\v4.7.2”,
“C:\\Program Files (x86)\\Reference Assemblies\\Microsoft\\WindowsPowerShell”,
“C:\\Windows\\assembly”
],
.NET Framework 4.7.2 was installed
LikeLike
Hi all,
I installed BC150 on my server with Docker Container installation and it run on
And I built Base Application from source code with custom version and it included translated file (XLF for content are my language (not English) and target language is still default). However, I publish this base app then it is not fire change on the UI of web browse.
How to apply a language that not support by Microsoft for countries yet?
Please, help me!
Thank you so much.
LikeLike
Is the XLIFF correctly created? Source is the original language (source nodes in XLIFF file), target is the new language.
LikeLike
Yes, my source tag is original and target tag is my language.
LikeLike
It is correct because I copied it from Base Application.en-US.xlf file) and then I edited to my target and then I deployed and installed it successful but it not fired change to my language of content on my web browse.
LikeLike
Hi Stefano,
Thanks for sharing the info. However i would like to ask if we can modify Base app file for Business central Cloud version? If yes then would it be the same procedure?
Thanks.
LikeLike
No, for the SaaS version you cannot modify the Base Application. This is not allowed.
LikeLike
Thanks. I want to transfer custom field value from Item table to sales line table. I know in on prem we can do it thru CopyFromItem. Could you please suggest how to do in on Cloud?
LikeLike
Different ways: first in my mind, you can write an event subscriber to OnAfterValidateEvent if the No. field of the Sales Line table and from here you can retrieve the Item record and then copy fields you need from Item to Sales Line.
LikeLike
Hi Stefano,
As you suggested, i tried with event subscriber but getting some errors. It doesn’t allow me to add
table name “Sales Line”. Could you please check below and suggest
LikeLike
[EventSubscriber(ObjectType::Table, Table:: Sales Line,’OnAfterValidateEvent’, ‘No.’, true, true)]
local procedure CopyFromItem(var Rec: Record “Sales Line”; var xRec: Record “Sales Line”; var Item: Record Item; CurrFieldNo: Integer)
begin
if (Rec.Type Rec.Type::Item) OR (Rec.”No.” = xRec.”No.”) then
exit;
Rec.SetRange(“No.”, Rec.”No.”);
if Rec.FindLast then
Rec.”Commission Rate %” := Item.”Commission Rate %”;
LikeLike
This code is wrong. Lots of rows without sense, but expecially this line is wrong:
Rec.SetRange(“No.”, Rec.”No.”);
You’ve to simply retrieve the Item record from the Sales Line, so something like:
If Item.Get(Rec.”No.”) then
Begin
//here transfer your fields
End;
LikeLike
Is it possible to modify the base application in new version BC 15.3. as there is a option to Uninstall base application in Extension management. pls advise . thanks
LikeLike
For the on-premise version yes it’s possible.
LikeLike
Hi Stefano,
Thanks for sharing the info. However i would like to ask how to modify Base app file for Business Central Cloud? As we dont have direct access to the database in the cloud(Online) version.
Thanks.
LikeLike
Hi Stefano,
I notice now that we have “DotNet Aliases” module in system app. Can we use this module in extension that target is set to cloud?
If we can not use any system libraries on cloud, is then only solution to switch to native types for cloud?
Thanks
LikeLike
“DotNet Aliases” module defines aliases for .NET classes so that you do not have to write the full name of the class. For example, rather than having to write “System.Collections.Queue”, you can just use “Queue”.
It has target = “OnPrem”, so it cannot be used on SaaS.
LikeLike
Hi Stefano,
Thanks for the interesting post.
I’m facing an issue, I’m working in a project using BC SaaS with localization Canada.
The PowerShell script to extract the source code of the BaseApp fails. I thought because I’m using the image of a sandbox mcr.microsoft.com/businesscentral/sandbox:ca
Then I tried to download the same image for the on-premise but it does not exist any image related to Canada.
Is there any alternative way to get the source code?
Using AL Object Designed Addon I can navigate in the objects but I cannot see the RDLC layout files of standard reports.
LikeLike
You should be able to extract the source files also from the sandbox image. What errors do you have? Is NavContainerHelper updated? If you have created the Docker container by using the -includeAL option you should have the source files saved in C:\ProgramData\NavContainerHelper\YOURVERSION-Files folder.
LikeLike
The error message is “Container was not started with -includeAL (or -doNotExportObjectsAsText was specified)” but I’ve created the container using -includeAL
LikeLike
Hi Stefano,
i followed the official steps to modify the baseapp. https://docs.microsoft.com/en-us/dynamics365/business-central/dev-itpro/developer/devenv-publish-code-customization
I can publish the baseapp modified, but all the extension like Paypal etc are not published. It’s necessary install all of them on by one???
LikeLike
Yes you need to republish them. You can do that one by one or with a Powershell script
LikeLike